· Tutorials · 3 min read
How to Install Stable Diffusion with AUTOMATIC1111 UI on Windows
Learn how to install Stable Diffusion with the AUTOMATIC1111 user-friendly interface on your Windows PC. Create stunning AI-generated images effortlessly.
Stable Diffusion is a powerful AI model for generating images from text prompts. While it can be run via command line, using a graphical user interface (GUI) makes it much more accessible. This tutorial will guide you through installing Stable Diffusion with the AUTOMATIC1111 UI on Windows.
Prerequisites
Before we begin, ensure you have the following:
- A Windows PC with a decent GPU
- An internet connection
Step 1: Download and Install Python
Stable Diffusion requires Python 3.10.6 specifically. Download the Windows installer from python.org. Run the installer and make sure to check the box that says “Add Python to PATH”.

Step 2: Download and Install Git
Stable Diffusion requires git installed. Download and install Git from git-scm.com.
Step 3: Download the Stable Diffusion Source Code
You have two options here.
Option 1: Download the latest release
Go to the releases page of the AUTOMATIC1111 repository. Download the latest source code zip file.
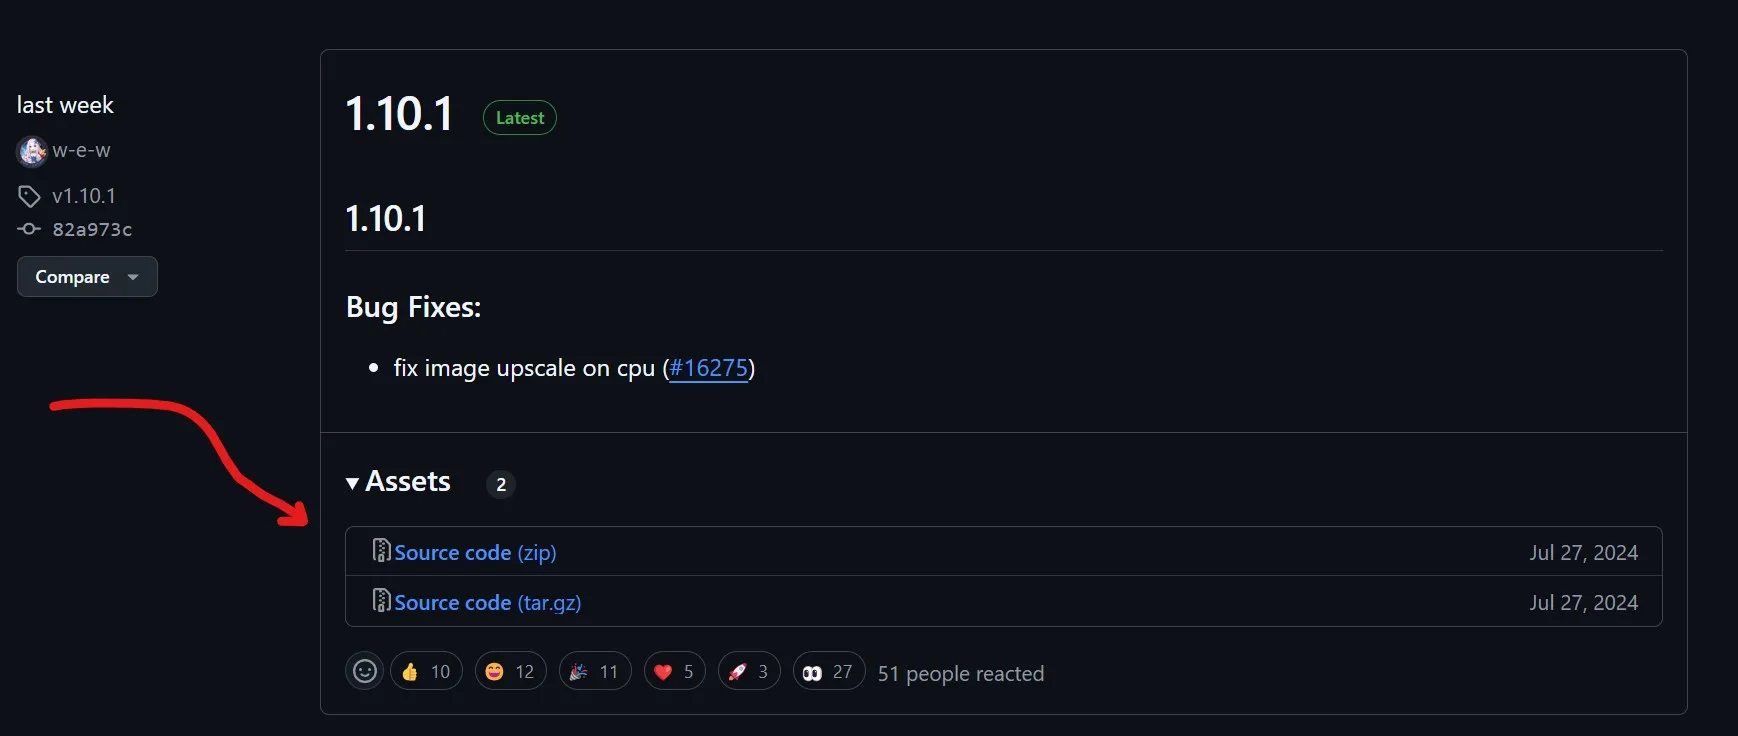
Unzip it to a directory of your choice.
Option 2: Use git to clone it.
git clone https://github.com/AUTOMATIC1111/stable-diffusion-webui.gitStep 4: Run Stable Diffusion with the AUTOMATIC1111 UI
Navigate to the unzipped directory and run the webui-user.bat file to start the Stable Diffusion server with the AUTOMATIC1111 UI.
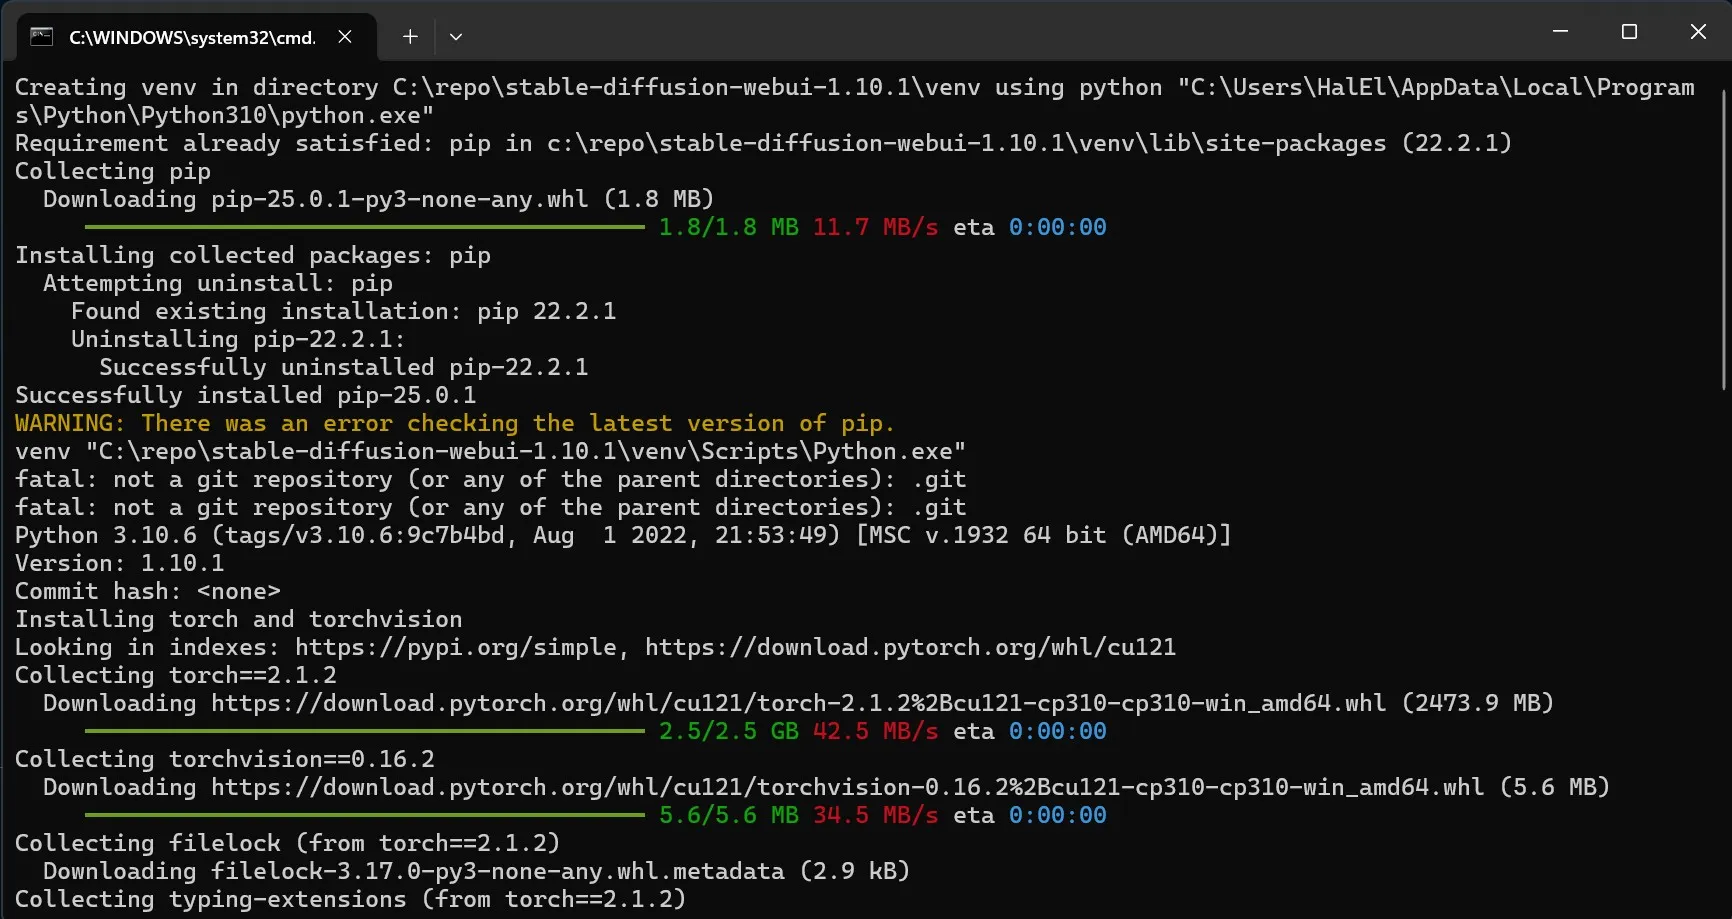
This may take a while to run. It will download everything it needs and then run a web server.
After it’s done, open your web browser and navigate to http://localhost:7860 to access the Stable Diffusion UI. However, it might open the webpage by itself.
Moving forward, you can open the same file to get the UI running, but it won’t take as long to warm up.
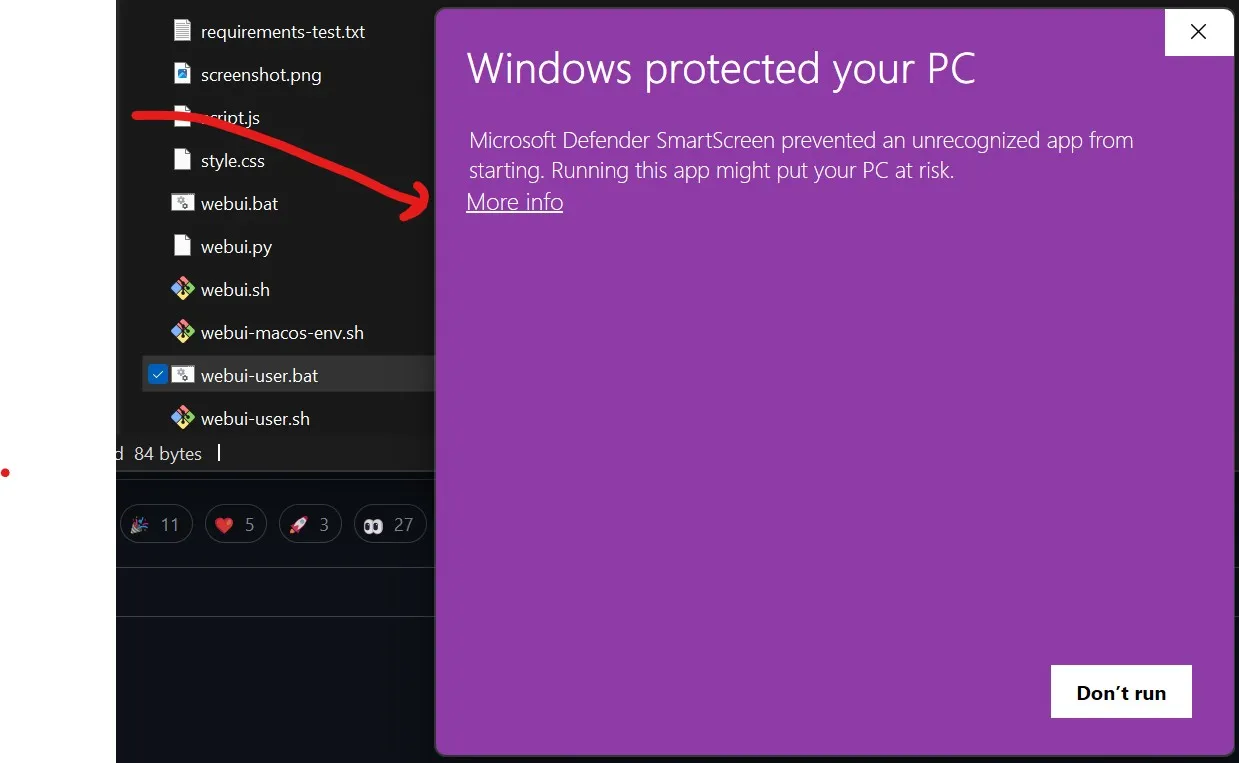
Windows Defender might warn you
Since you are using the latest release, chances are Windows Defender may try to stop you when you run the webui-user.bat file.
You have two choices:
- You can try an older release
- Run it by pressing
More Infothen pressingRun anyway

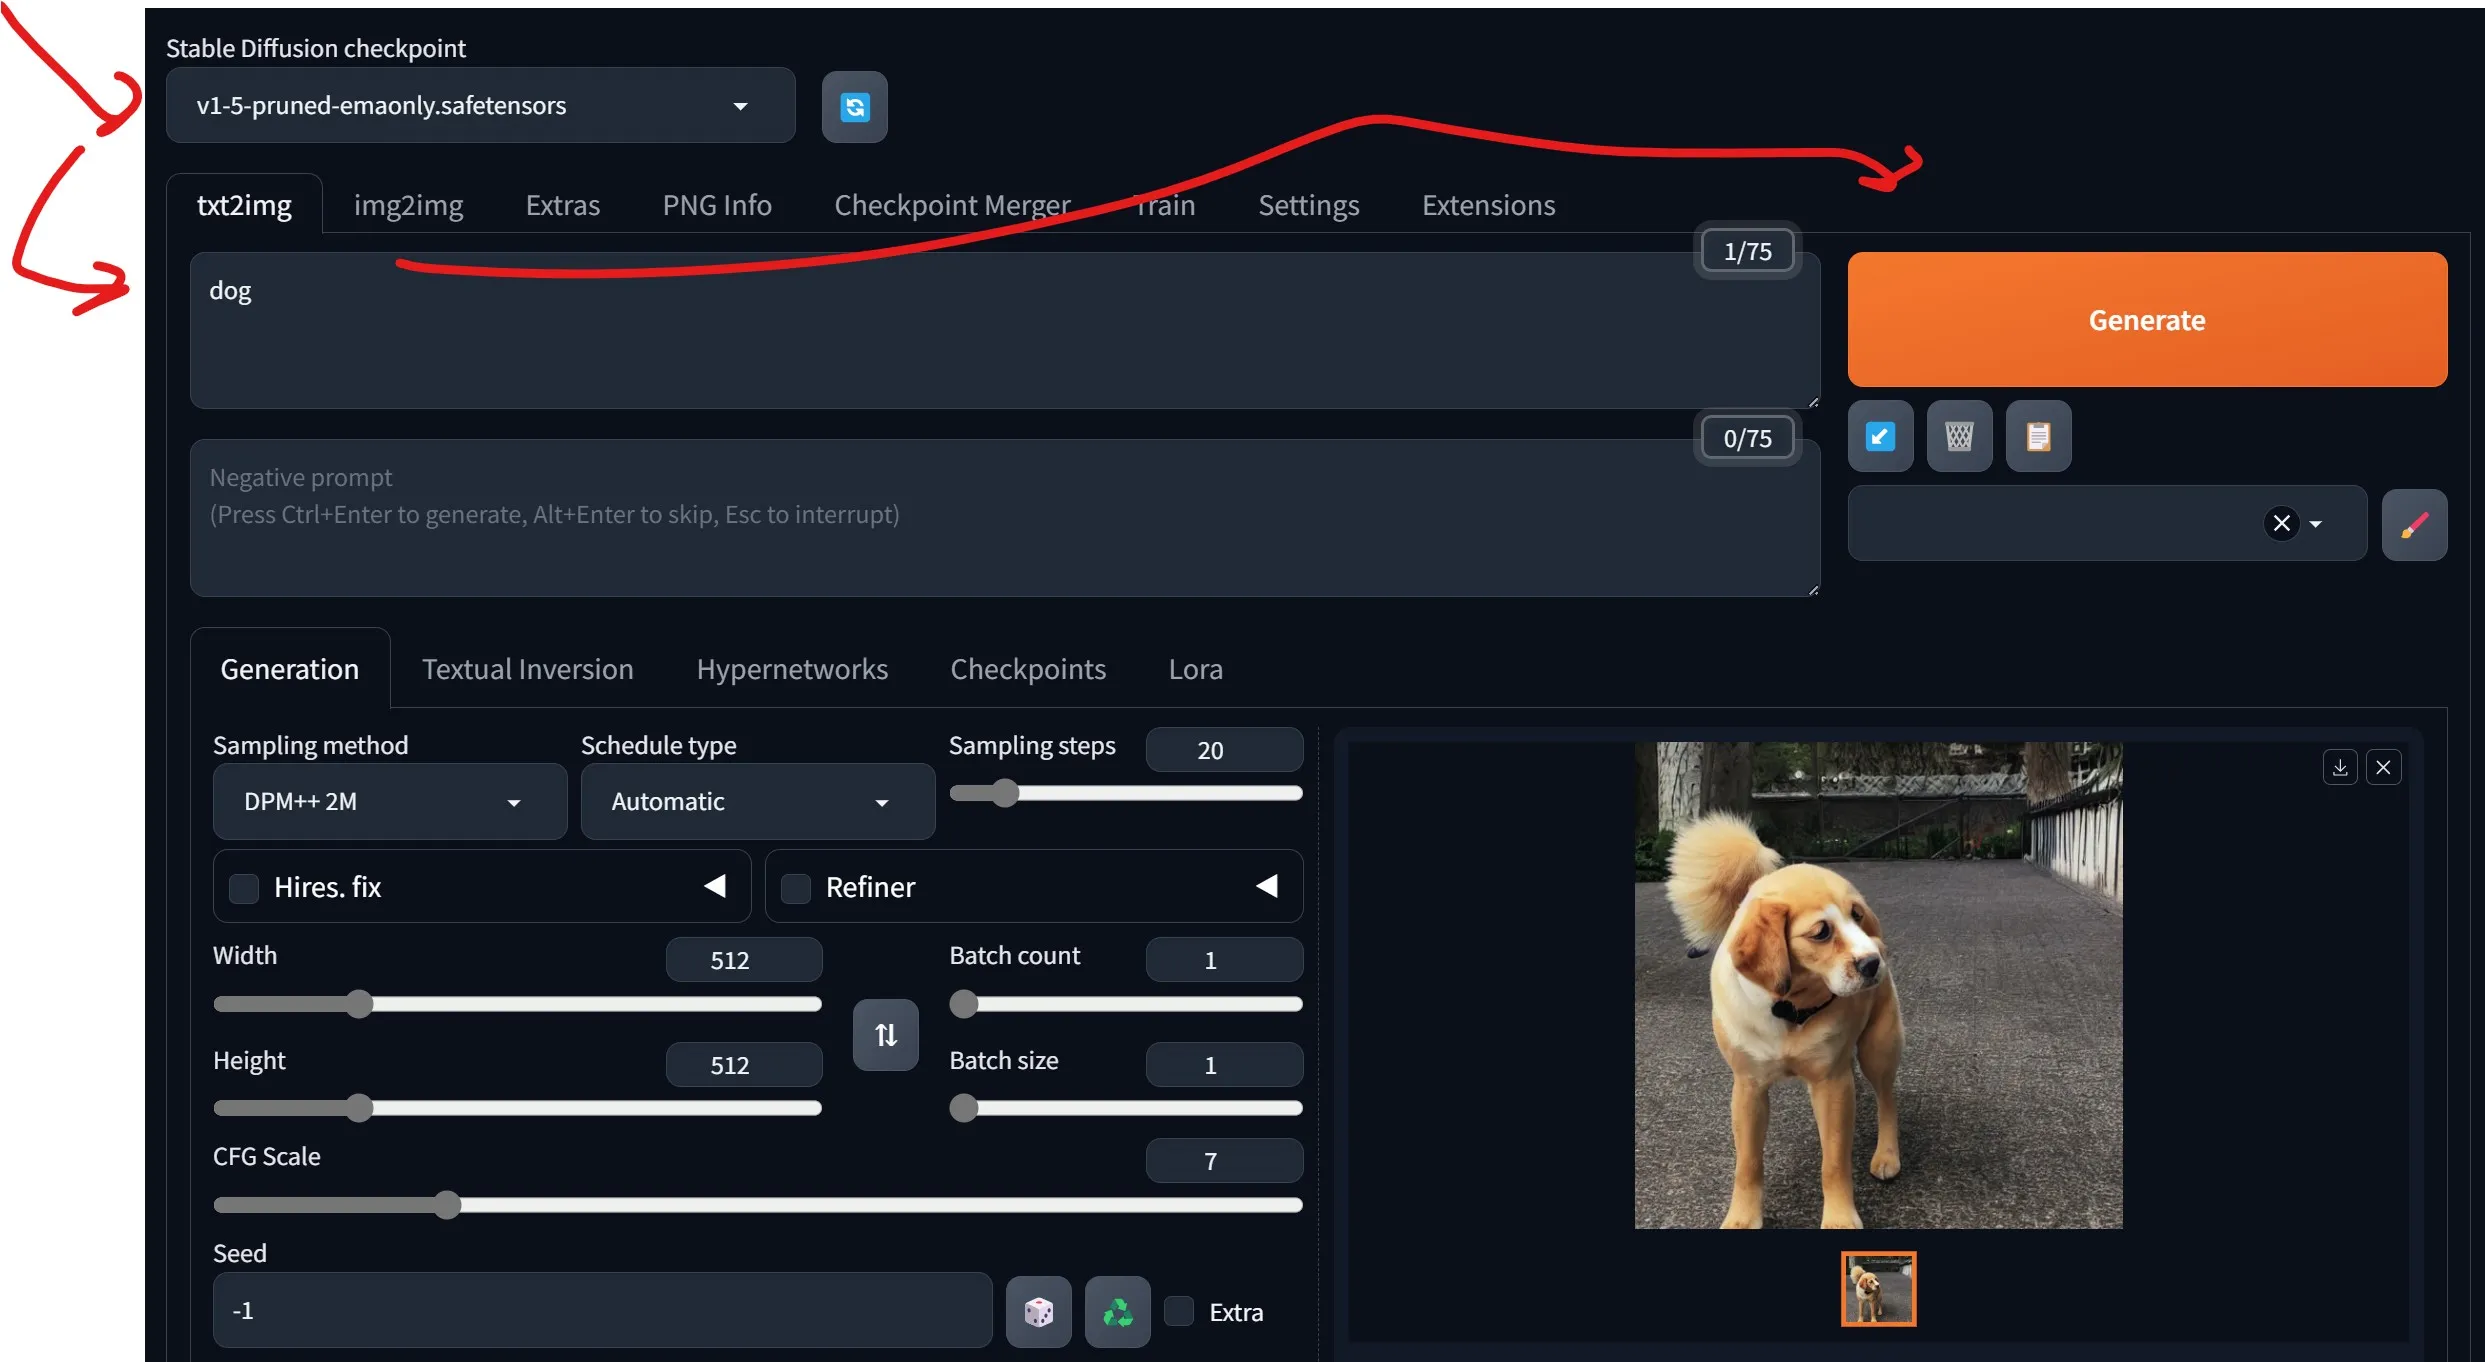
Step 5: Do a test run
On the top left, set the model to v1-5-pruned-emaonly.safetensors. Enter a prompt. Click generate.
Issues? See troubleshooting.
Step 6: Download Pre-trained Models
Here are two sites I recommend to download models from:
Example
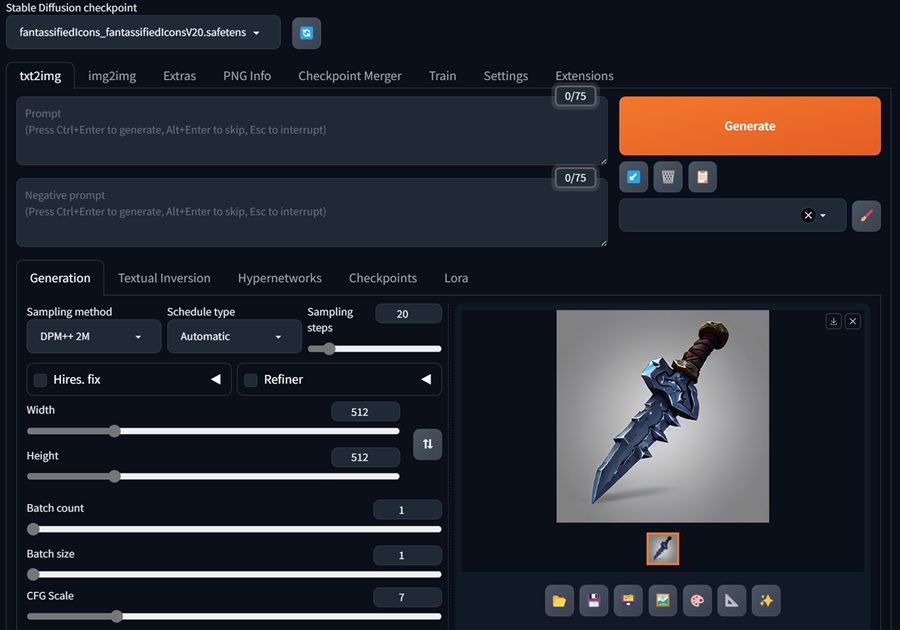
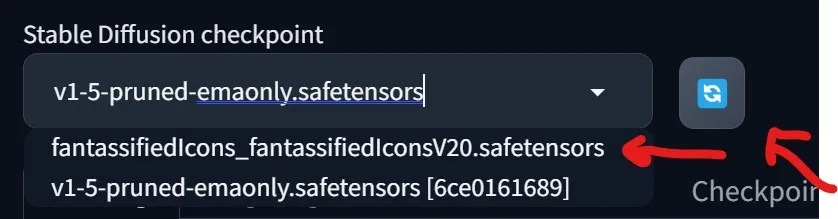
To give you an example of installing a model, I’m going to download this checkpoint model (https://civitai.com/models/4713/fantassified-icons) and place it in {my working directory}\models\Stable-diffusion.
Then, on the top left, we press the refresh button and select the model.
This model is useful to me as I can generate cool UI for my game development addiction.
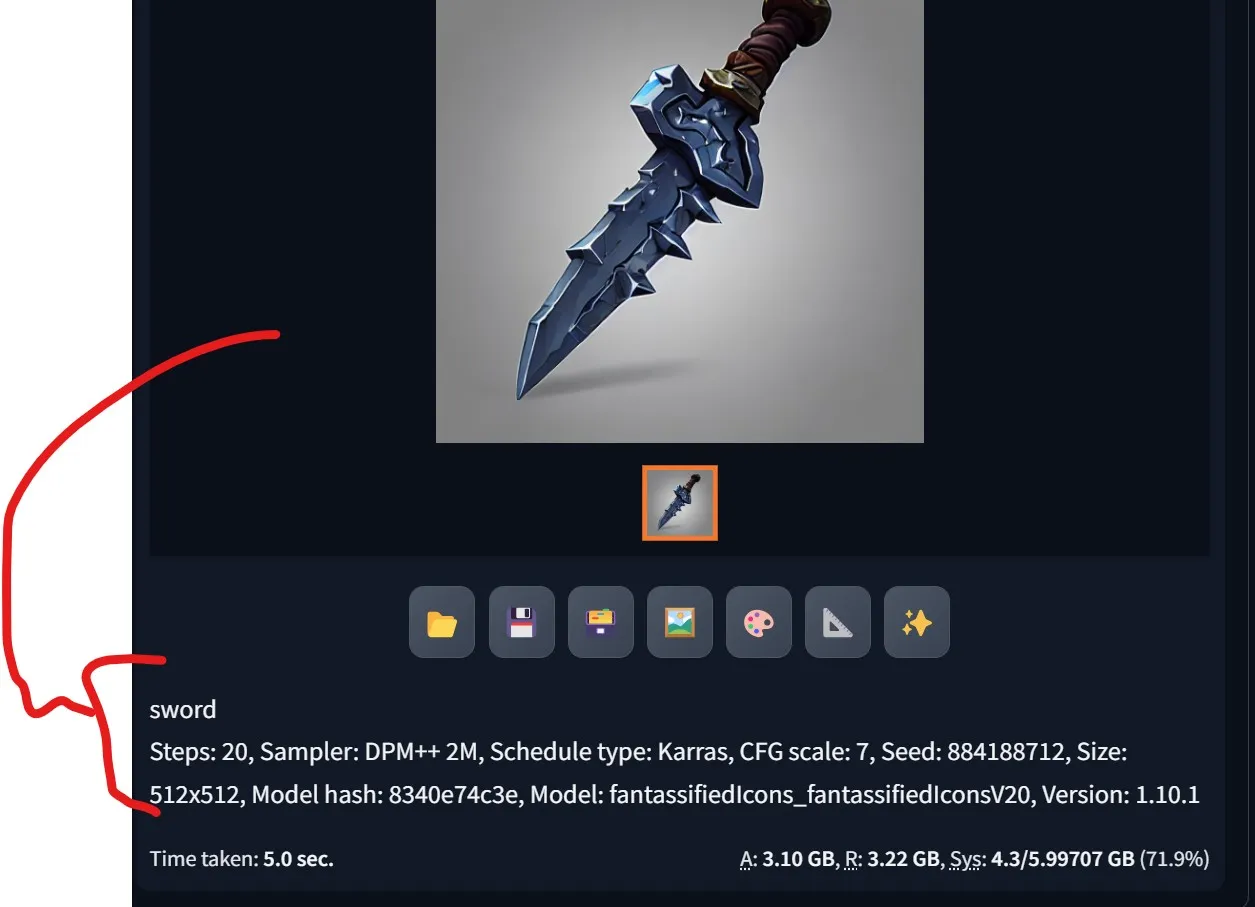
This is what I got when I used the prompt “sword”:

If you wanted to create this exact image, assuming you downloaded the same model, copy the following:
sword
Steps: 20, Sampler: DPM++ 2M, Schedule type: Karras, CFG scale: 7, Seed: 884188712, Size: 512x512, Model hash: 8340e74c3e, Model: fantassifiedIcons_fantassifiedIconsV20, Version: 1.10.1
Then paste it into the prompt and press the blue arrow button under generate. This will apply the same settings I used to create this image. Press generate and you should get the same photo.
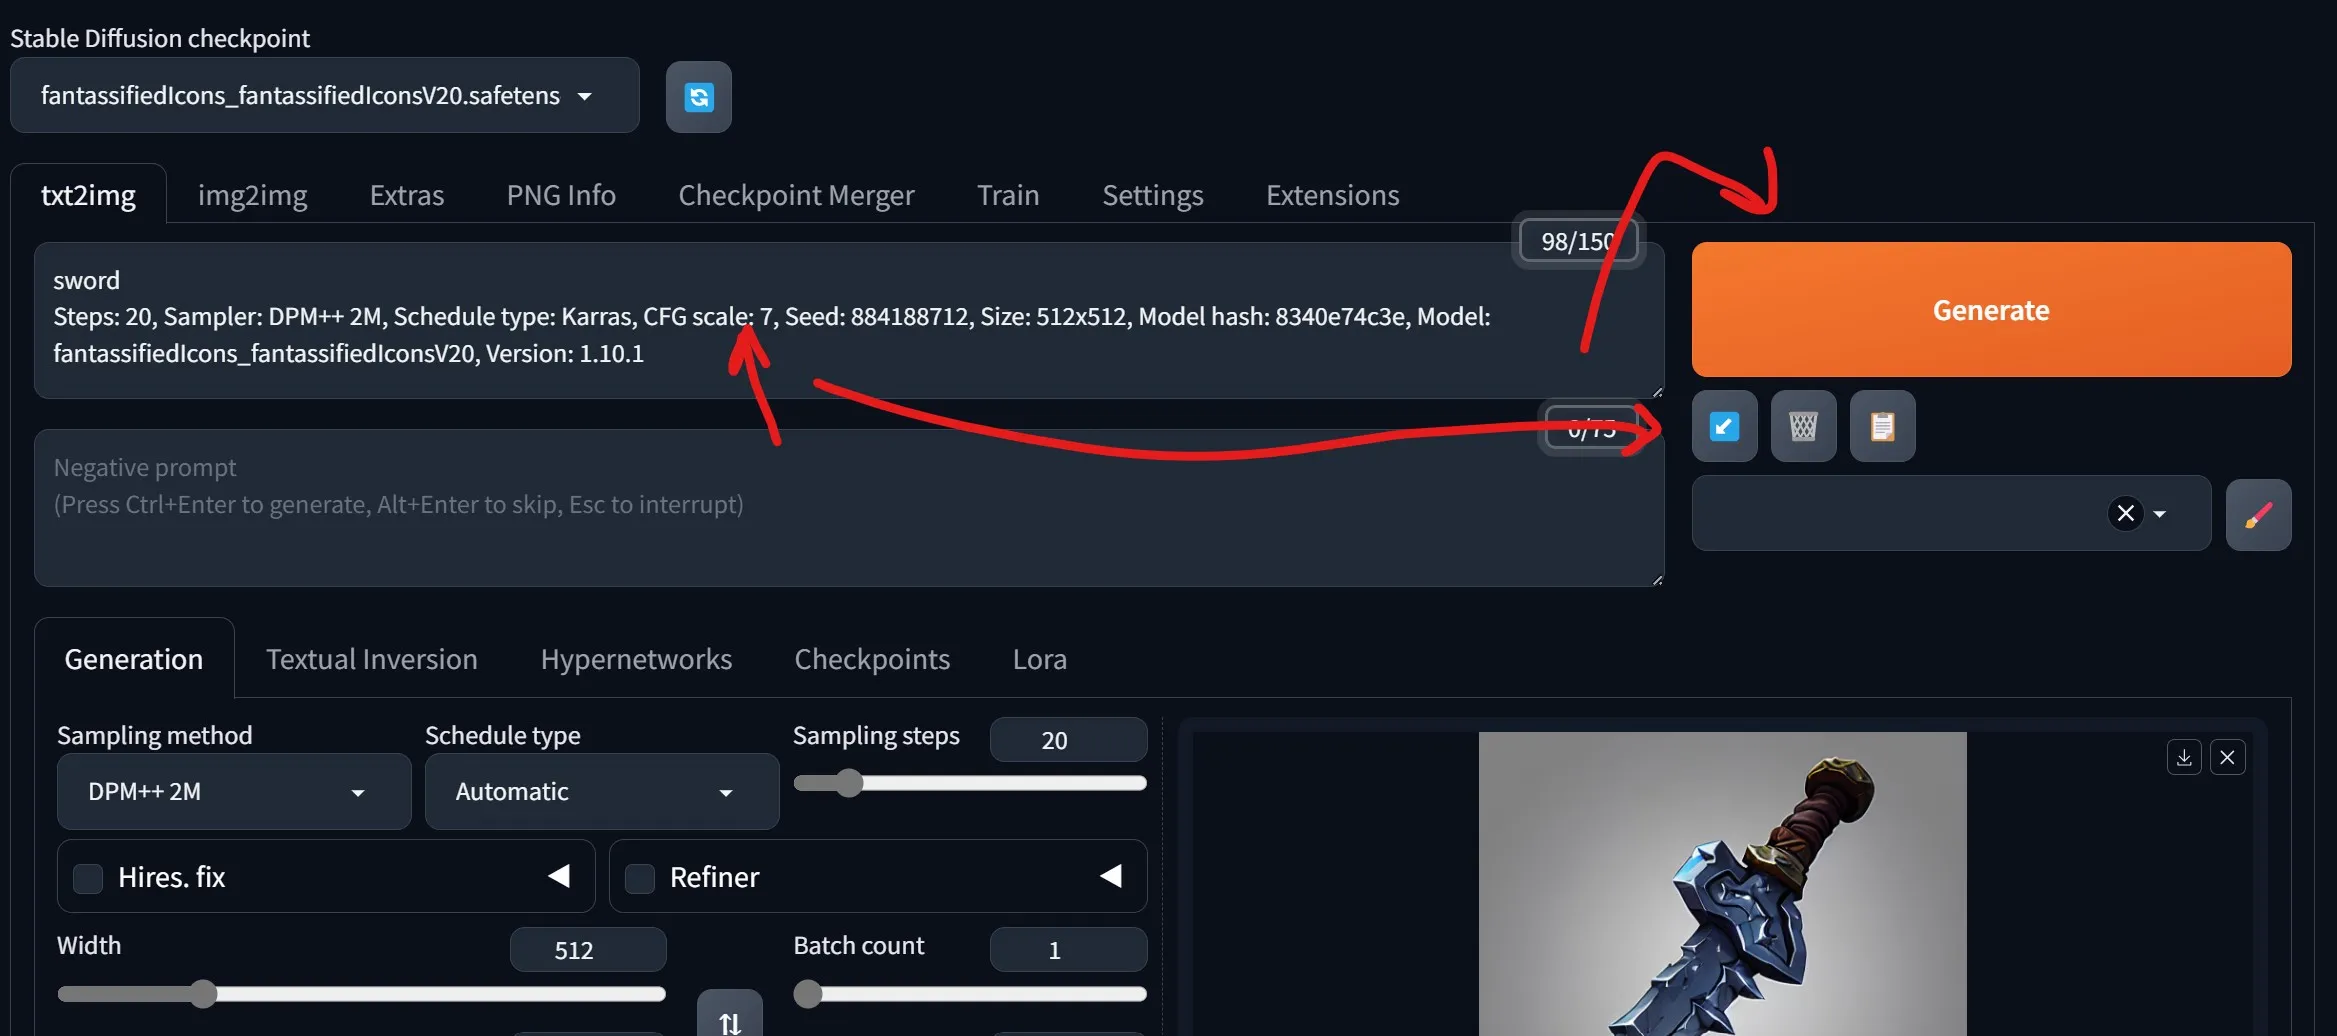
If you wanted to save a prompt or share it, you can find it under the image.
Troubleshooting
- Error: “CUDA out of memory”: Reduce the batch size or use a lower resolution.
- UI not loading: Ensure all dependencies are installed correctly and the server is running. One tip is to make sure you installed the correct Python version and you installed it correctly. Delete the folders
venvandtmpto reset.
Conclusion
You have successfully installed Stable Diffusion with the AUTOMATIC1111 user-friendly interface on your Windows PC. Enjoy creating stunning AI-generated images effortlessly!