· Updated · Tutorials · 8 min read
Protect Your Home Network with Pi-hole: The Ultimate Ad-blocking Solution
Say goodbye to annoying ads and take control of your home network with Pi-hole, a powerful DNS-level ad blocker that works on all your devices without slowing down your browsing experience or requiring individual device setup.
Tired of being bombarded with ads on every website and app you use? Pi-hole is about to become your new best friend! This powerful network-wide tool blocks ads at the DNS level, which means it protects all the devices in your home without having to install anything on each one. Let me show you how to set it up on your Raspberry Pi!
What Makes Pi-hole So Awesome?
Pi-hole is basically a black hole for ads (hence the name). It works by acting as a DNS server for your network and filtering out requests to known ad servers and tracking domains. Here’s why you’ll love it:
Network-Wide Protection: Once set up, it blocks ads on every device connected to your network—from laptops and phones to smart TVs and gaming consoles, without any per-device configuration.
Performance Boost: By blocking ads before they load, your internet feels faster and uses up to 30% less bandwidth. Pages load noticeably quicker without all that ad content slowing things down!
Battery Life Saver: Your mobile devices will thank you as they’ll use less battery not loading and displaying ads, potentially extending usage time by hours.
Privacy Shield: Pi-hole blocks tracking domains too, so advertisers have a harder time following your online activities and building profiles about you.
Detailed Statistics: The slick dashboard shows you exactly what’s being blocked and gives you control over what gets through, with real-time insights into your network traffic.
The best part? You can run Pi-hole on super cheap hardware like a Raspberry Pi (that’s where the name comes from), and Docker makes it incredibly easy to set up, maintain, and update without technical complexity.
What You’ll Need
- A Raspberry Pi running Raspberry Pi OS (see my Raspberry Pi setup guide)
- Docker and Docker Compose installed (see Install Docker and Docker Compose on Raspberry Pi)
- Access to your router’s admin portal (for network-wide ad blocking)
- Basic understanding of your home network (or willingness to learn!)
Step 1: Prepare for Pi-hole Installation
Before we jump into installing Pi-hole, make sure you’ve completed these essential prerequisites:
Your Raspberry Pi is set up and running Raspberry Pi OS. If you haven’t done this yet, follow my Raspberry Pi setup guide first.
You have Docker and Docker Compose installed. If not, check out Install Docker and Docker Compose on Raspberry Pi.
Set up a static IP for your Raspberry Pi using your router. Since Pi-hole functions as a DNS server, it needs a permanent IP address that won’t change:
- Find your Pi’s MAC address by running
ip linkorifconfig -aon your Pi (it looks likeaa:bb:cc:dd:ee:ff) - Log into your router’s admin interface (typically 192.168.1.1 or 192.168.0.1)
- For Netgear routers:
- Go to “Advanced” > “Setup” > “LAN Setup” > “Address Reservation”
- Click “Add” and select your Raspberry Pi from the list (or enter its MAC address manually)
- Assign it a static IP outside your router’s DHCP range but on the same subnet
- Click “Apply” to save changes
- For other router brands:
- Look for “DHCP Reservation,” “Static DHCP,” or “Address Reservation” in your router settings
- Add a new reservation with your Pi’s MAC address and your desired IP address
- Save the changes
No configuration is needed on the Raspberry Pi itself - the router will always assign it the same IP address.
- Find your Pi’s MAC address by running
Step 2: Install Pi-hole with Docker
Now for the fun part! Let’s get Pi-hole installed using Docker for easy setup and maintenance:
- Connect to your Raspberry Pi via SSH:
ssh username@your_pi_ip_address- Create a directory for Pi-hole and navigate to it:
mkdir -p ~/pi-hole
cd ~/pi-hole- Create a
docker-compose.ymlfile:
nano docker-compose.yml- Paste this configuration (press Ctrl+Shift+V to paste in terminal):
version: '3'

services:
  pihole:
    container_name: pihole
    image: pihole/pihole:latest
    # For DHCP it is recommended to remove these ports and instead add: network_mode: "host"
    ports:
      - '53:53/tcp'
      - '53:53/udp'
      - '80:80/tcp'
    environment:
      TZ: 'America/New_York'
      # WEBPASSWORD: 'set a secure password here or it will be random'
      # Uncomment the line above to set a specific password
    # Volumes store your data between container upgrades
    volumes:
      - './etc-pihole:/etc/pihole'
      - './etc-dnsmasq.d:/etc/dnsmasq.d'
    # Recommended but not required (DHCP needs NET_ADMIN)
    cap_add:
      - NET_ADMIN
    restart: unless-stopped
Save the file (Ctrl+X, then Y, then Enter)
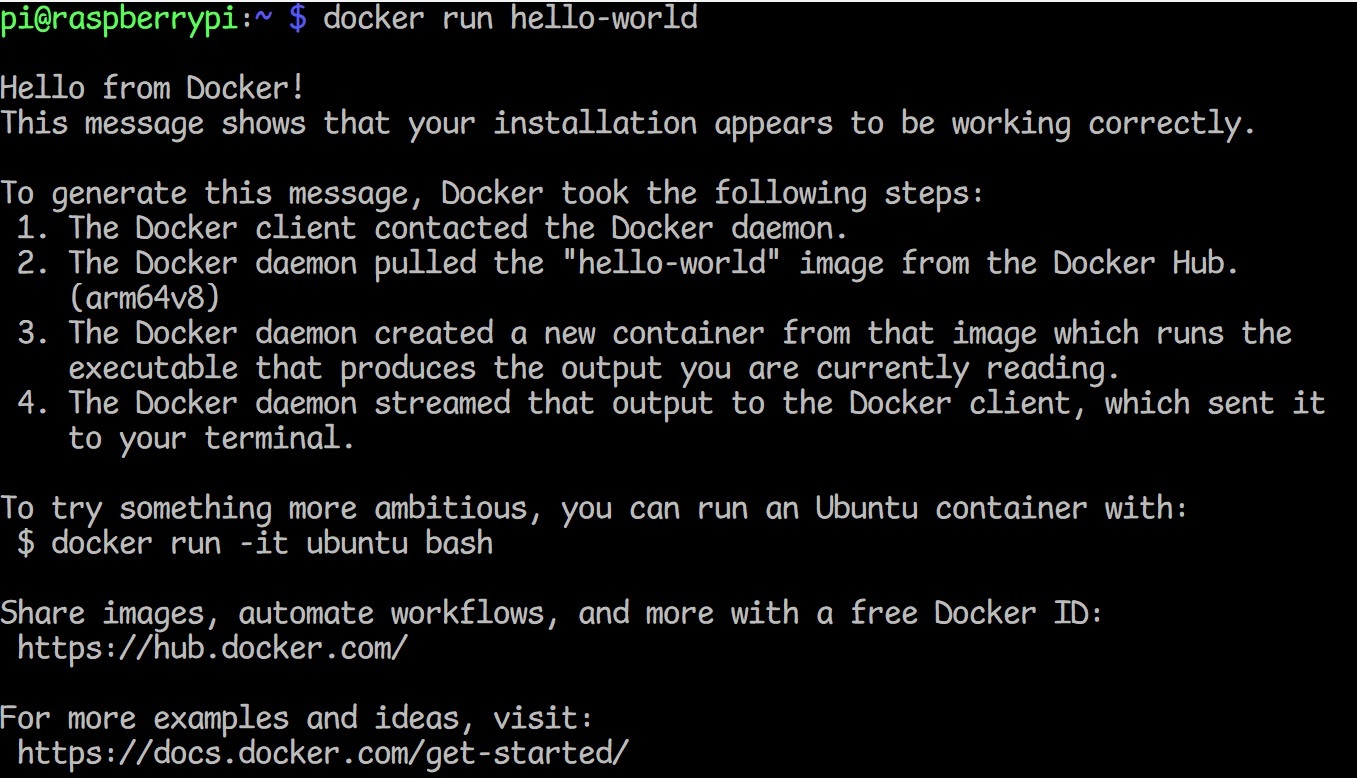
Start Pi-hole:
docker compose up -d- Find your admin password:
docker logs pihole | grep password- Make a note of this password – you’ll need it to access the admin dashboard.
Using Docker for Pi-hole offers several advantages:
- Easy installation and updates
- Minimal impact on your base operating system
- Simple backup and restoration
- Container isolation for better security
- Consistent environment across different installations
Step 4: Make Your Network Use Pi-hole
For Pi-hole to block ads across your network, you need to tell your devices to use it as their DNS server. You have two options:
Option A: Configure Your Router (Best Method)
I’ll show you how to do this with a Netgear router, but the process is similar for other brands. You’ll need access to your router’s admin portal:
Open a web browser and go to your router’s IP address (typically 192.168.1.1 or 192.168.0.1)
Log in with your admin credentials. If you’ve never changed them, check the label on your router for the default username and password
For Netgear routers:
- Go to “Advanced” > “Setup” > “Internet Setup”
- Find the “Domain Name Server (DNS) Address” section
- Select “Use These DNS Servers”
- Enter your Pi-hole’s IP address in the “Primary DNS” field
- You can use a public DNS like 1.1.1.1 (Cloudflare) or 8.8.8.8 (Google) as your “Secondary DNS” backup
- Click “Apply” to save changes
For other router brands:
- Look for “DNS settings” which might be under WAN, DHCP, or Network settings
- Replace the primary DNS server with your Pi-hole’s IP address
- Save your changes and restart the router if prompted
This way, all devices on your network automatically use Pi-hole without any additional setup!
Option B: Configure Individual Devices
If you can’t change router settings or only want certain devices protected:
- Windows: Go to Network Connections > Properties > IPv4 > Properties > Use the following DNS server
- Mac: System Preferences > Network > Advanced > DNS
- iOS: Settings > Wi-Fi > (tap your network) > Configure DNS > Manual
- Android: Settings > Network & Internet > Wi-Fi > (tap your network) > Edit > Advanced options > IP settings > Static
Step 5: Enjoy Your New Ad-free Experience
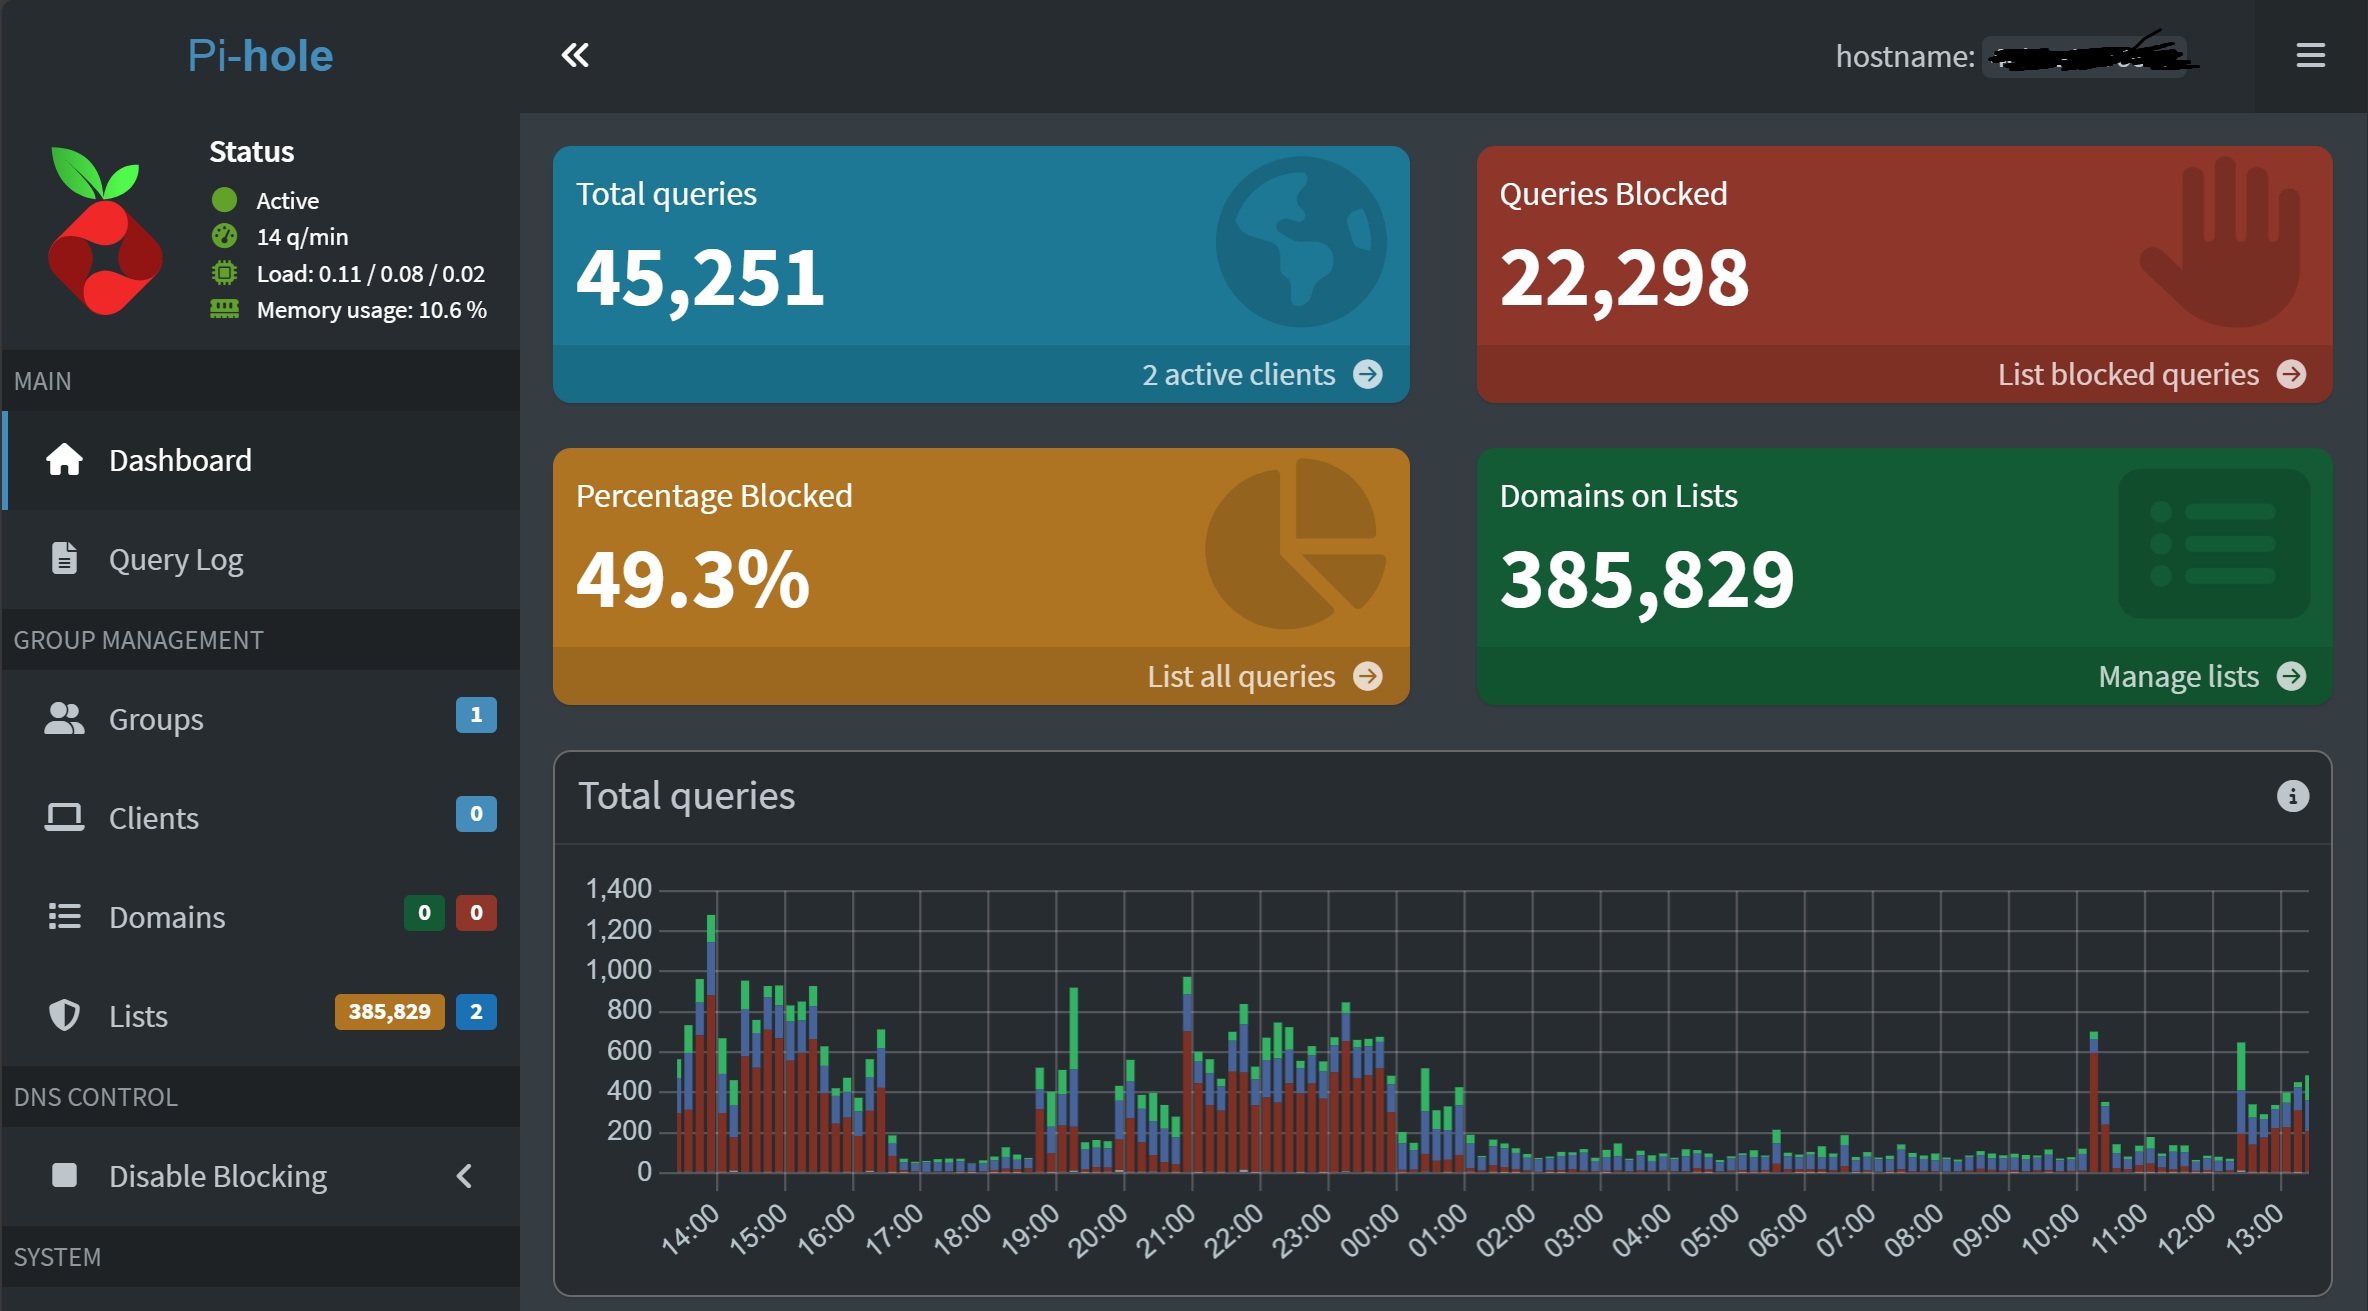
Fire up the Pi-hole dashboard to see it in action! Open a web browser and go to:
http://your_pi_ip_address/adminLog in with the password from the installation process. You’ll see a dashboard showing real-time stats about the ads and trackers being blocked on your network. It’s pretty satisfying to watch the numbers climb!
Step 6: Fine-tune Your Docker Pi-hole Setup
Pi-hole works great out of the box, but here are some advanced tweaks to make your Docker setup even more effective:
Add More Block Lists for Maximum Protection
The default blocklist is good, but you can enhance protection significantly by adding these curated lists:
In the Pi-hole dashboard, go to Group Management > Adlists
Add some of these popular blocklists (This is what I’m using):
After adding new lists, update them by going to Tools > Update Gravity
Whitelist Important Domains for Smooth Experience
Sometimes Pi-hole blocks domains that you actually need for everyday services. If something stops working, you can whitelist it:
- Go to Whitelist in the dashboard
- Add the domain that’s being incorrectly blocked
- Click Add to Whitelist
Configure Container Auto-Restart
Make sure your docker-compose.yml includes restart: unless-stopped as shown in the example above. This ensures Pi-hole automatically starts after system reboots.
Troubleshooting Common Docker Pi-hole Issues
Problem: Cannot access Pi-hole admin page?
- Solution: Make sure port 80 isn’t being used by another service. You can change the port mapping in your docker-compose.yml if needed (e.g.,
"8080:80/tcp").
Problem: DNS resolution not working?
- Solution: Check if port 53 is available. Some systems use systemd-resolved which might conflict with Pi-hole. You might need to disable it with
sudo systemctl disable systemd-resolvedandsudo systemctl stop systemd-resolved.
Problem: Container stops unexpectedly?
- Solution: Check container logs with
docker logs piholeto identify the issue. Often this is due to memory constraints or conflicts with host services.
Problem: Pi-hole dashboard shows it’s blocking ads, but you still see some advertisements?
- Solution: Some advertisers use sophisticated techniques to bypass DNS blocking. Consider using more comprehensive blocklists or combining with a browser-based ad blocker for maximum protection.
Problem: Router won’t accept custom DNS settings?
- Solution: Some ISP-provided routers lock DNS settings. In this case, you may need to use your Pi-hole as your DHCP server (enable this in Pi-hole settings) or configure DNS individually on each device.
Problem: Pi-hole doesn’t block YouTube ads?
- Solution: YouTube serves ads from the same domains as their content, making it impossible for DNS-level blockers like Pi-hole to filter them out without also blocking the videos themselves.
Conclusion
Congrats! You’ve successfully set up your own network-wide ad blocker with Pi-hole running in Docker. Not only will you enjoy a cleaner, faster browsing experience, but you’ll also have better privacy protection and detailed insights into what’s happening on your network.
Running Pi-hole in Docker makes management super simple - if you ever need to update to the latest version, just run:
cd ~/pi-hole
docker compose pull
docker compose up -d
This ensures you always have the latest features and security updates without going through a complicated upgrade process.
Pi-hole is an excellent example of how open-source software running on inexpensive hardware can make a significant difference in your digital privacy and browsing experience. As you get more comfortable with it, you can explore advanced features like DNS-over-HTTPS for encrypted DNS queries, regex blocking for pattern matching, and integration with other Docker containers for a complete home network solution.