· Updated · Tutorials · 3 min read
Self-Host n8n with Docker Compose: Complete Installation Guide (Power Automate Alternative)
Learn how to self-host n8n, a powerful workflow automation tool, using Docker Compose. A great alternative to Power Automate for automating tasks and connecting services.
Introduction
n8n is a powerful workflow automation tool that allows you to connect different services and automate tasks. With Microsoft announcing the deprecation of personal account support in Power Automate, many users are looking for alternatives. Self-hosting your own automation platform like n8n is becoming a more attractive and cost-effective option. Self-hosting n8n with Docker Compose is a popular and recommended way to get started. This guide will walk you through the process of installing n8n using Docker Compose without a reverse proxy.
Prerequisites
Before we begin, make sure you have the following installed on your system:
- Docker: Container platform for running applications
- Docker Compose: Tool for defining multi-container Docker applications
If you’re using a Raspberry Pi (this will even run on a Pi 4!), you can follow my guide on how to install Docker and Docker Compose on a Raspberry Pi.
System Requirements
n8n has minimal system requirements:
- RAM: 512MB minimum (1GB recommended)
- Storage: 1GB free space
- CPU: Any modern processor (ARM64 and x86_64 supported)
- Network: Internet connection for downloading the Docker image
Installation Steps
Here are the steps to install n8n with Docker Compose:
Create a directory for your n8n project:
mkdir n8n-compose
cd n8n-compose
Create a
docker-compose.ymlfile: Create a file nameddocker-compose.ymland add the following content to it:services: n8n: image: n8nio/n8n restart: always ports: - '5678:5678' volumes: - 'n8n_data:/home/node/.n8n' volumes: n8n_data:Start n8n: Open your terminal, navigate to the directory where you created the files, and run the following command:
docker compose up -dAccess n8n: Once the command is finished, you can access your n8n instance by navigating to
http://localhost:5678in your web browser.Set up your account and activate community features: When you first access n8n, you’ll be prompted to create a local account. After creating your account, you’ll see a popup asking about activating a license key.
To unlock all self-hosting features:
- Enter your email address when prompted
- Check your email for a community license key from n8n
- Enter the key to activate all community features
This community license is free and gives you access to all self-hosting capabilities without any restrictions.
Conclusion
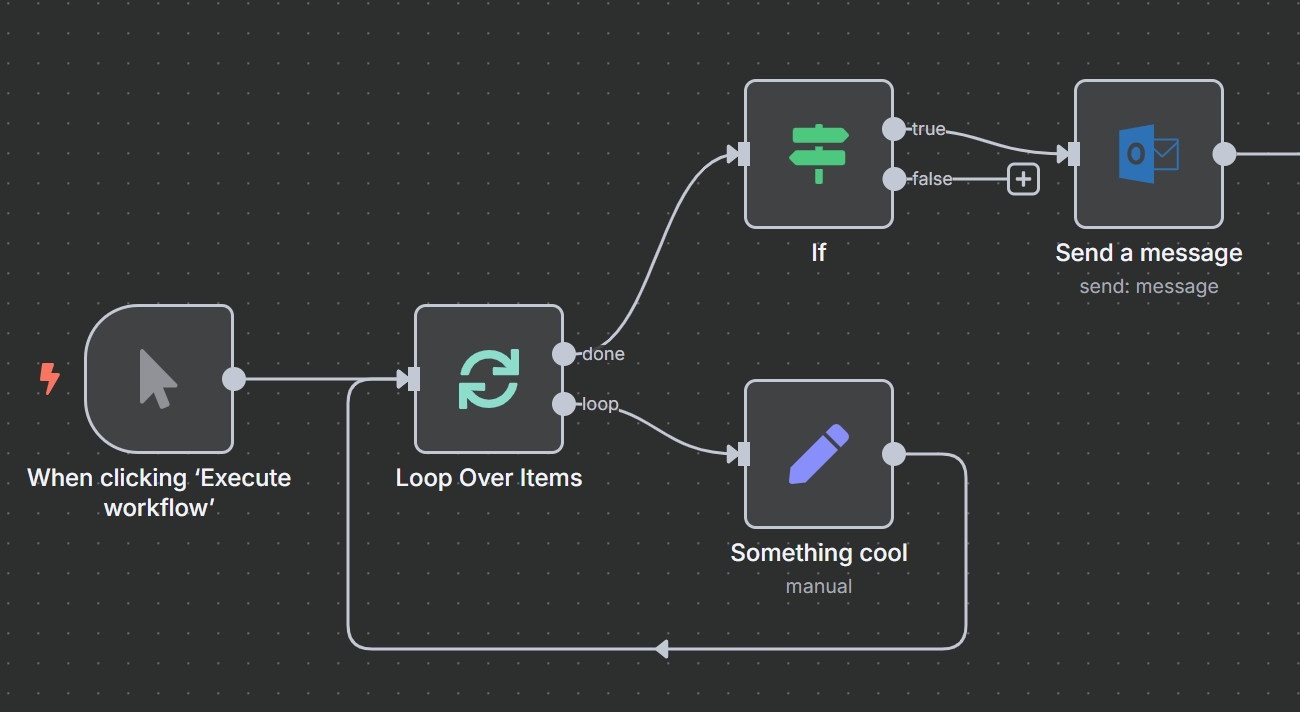
Congratulations! You have successfully installed n8n using Docker Compose. You can now start creating your own workflows and automating your tasks.
What’s Next?
Now that you have n8n running, you can:
- Create your first workflow by connecting different services
- Explore the built-in nodes for popular services like Gmail, Slack, and Google Sheets
- Set up webhooks to trigger workflows automatically
- Import workflow templates from the n8n community
Troubleshooting
If you encounter any issues:
- Make sure Docker and Docker Compose are running
- Check that port 5678 isn’t already in use by another application
- Verify the
docker-compose.ymlfile has correct indentation - Use
docker compose logs n8nto view container logs
For more advanced setups, consider adding SSL certificates, custom domains, or integrating with reverse proxies like Nginx or Traefik once you’re comfortable with the basic installation.