· Tutorials · 9 min read
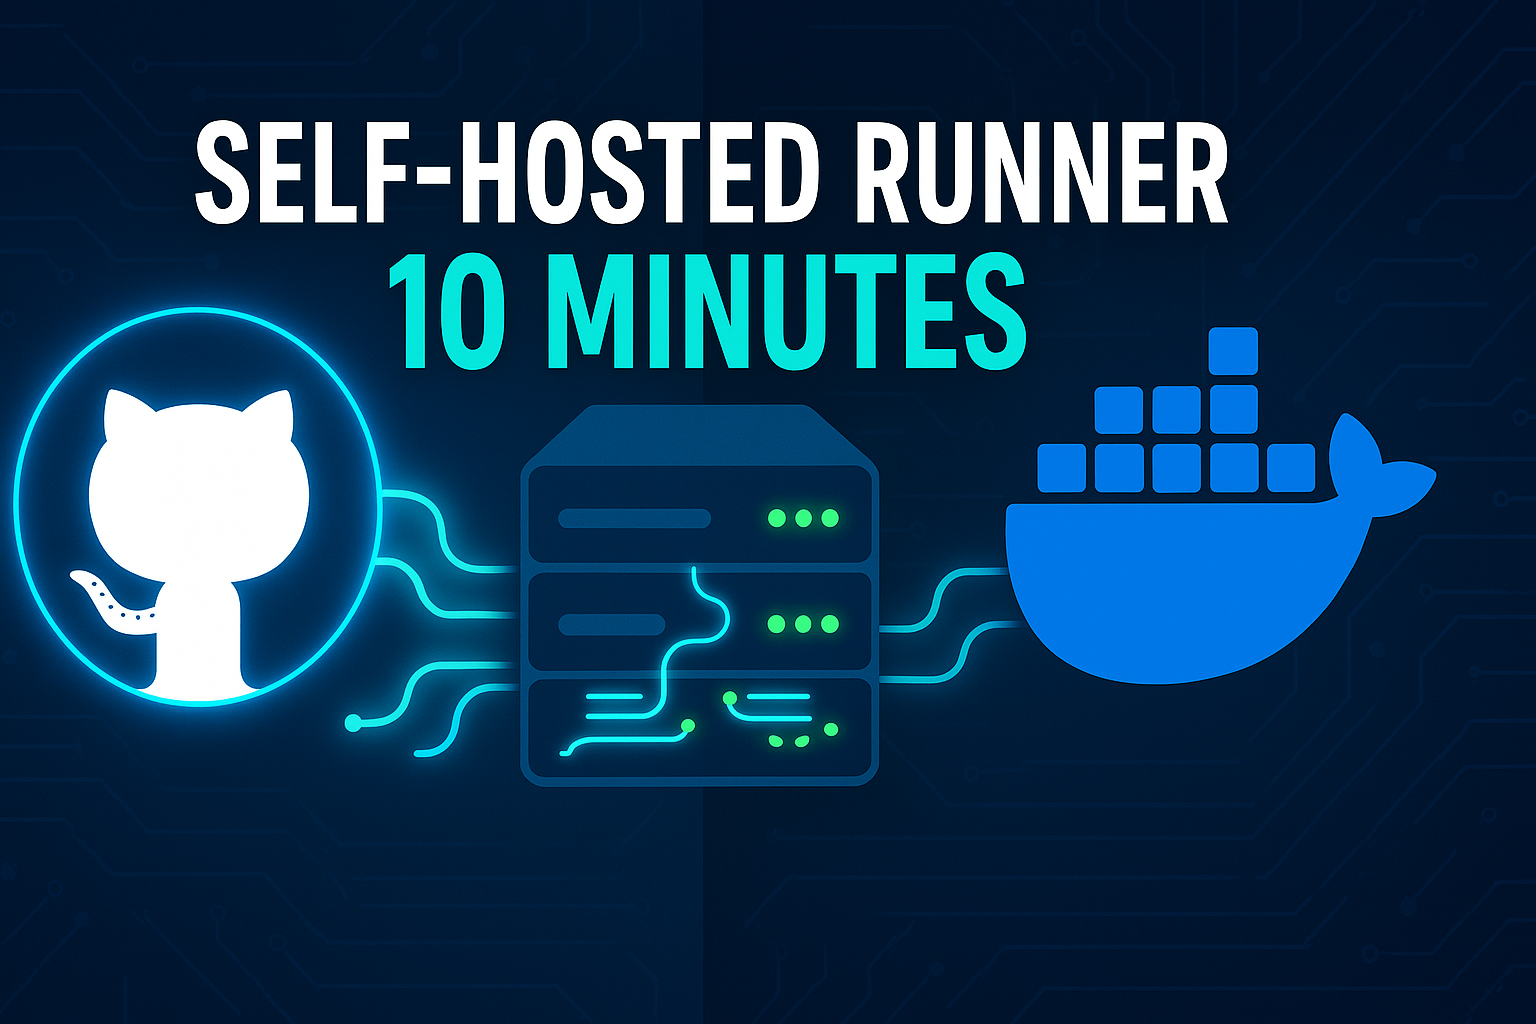
How to Setup a Hytale Dedicated Server with Docker
Learn how to setup a Hytale dedicated server using my production-ready Docker repository. Automated authentication and one-command deployment!

Ready to host a Hytale dedicated server the modern way? I’ve created a streamlined Docker setup that gets you up and running in minutes. Whether you’re hosting for friends or building a gaming community, this approach handles all the complexity for you. Let’s get started!
Why Docker for Your Hytale Dedicated Server?
Docker simplifies Hytale dedicated server hosting in ways traditional setups can’t match:
- One-Command Deployment: Launch your entire dedicated server with
docker-compose up --build - Automatic Authentication: Dedicated server handles OAuth2 device flow automatically on first boot
- Easy Updates: Pull latest changes and rebuild - no manual file management
- Scalability: Run multiple dedicated server instances effortlessly for different communities
- Resource Safety: Built-in CPU and memory limits prevent dedicated server crashes from consuming your host
- Portable Worlds: Move your game world between servers by copying volume files
- Simple Backups: Automated world data backups with Docker volumes
Prerequisites
Before we dive in, you’ll need:
- OS with Docker support: Linux (Ubuntu, Debian, CentOS, etc.), Windows 10/11 Pro or higher with Docker Desktop, or macOS
- Docker and Docker Compose installed
- At least 4 GB RAM (8 GB+ recommended for 20+ players)
- 30 GB+ disk space for world data and Docker images
- Stable internet connection with good upload speeds
- A Hytale game license (required for server authentication)
- Basic command-line familiarity
Step 1: Install Docker and Docker Compose
Linux/Raspberry Pi: Follow my comprehensive Docker and Docker Compose installation guide for detailed step-by-step instructions.
Windows: Download and install Docker Desktop for Windows. This includes both Docker and Docker Compose.
Quick verification - Once installed, confirm everything is working:
docker --version
docker-compose --version
Both commands should output version numbers without errors.
Step 2: Clone the Hytale Docker Repository
I’ve created a production-ready repository with everything pre-configured. Clone it to get started:
PowerShell or Bash:
git clone https://github.com/LeoTheLegion/hytale-docker.git
cd hytale-docker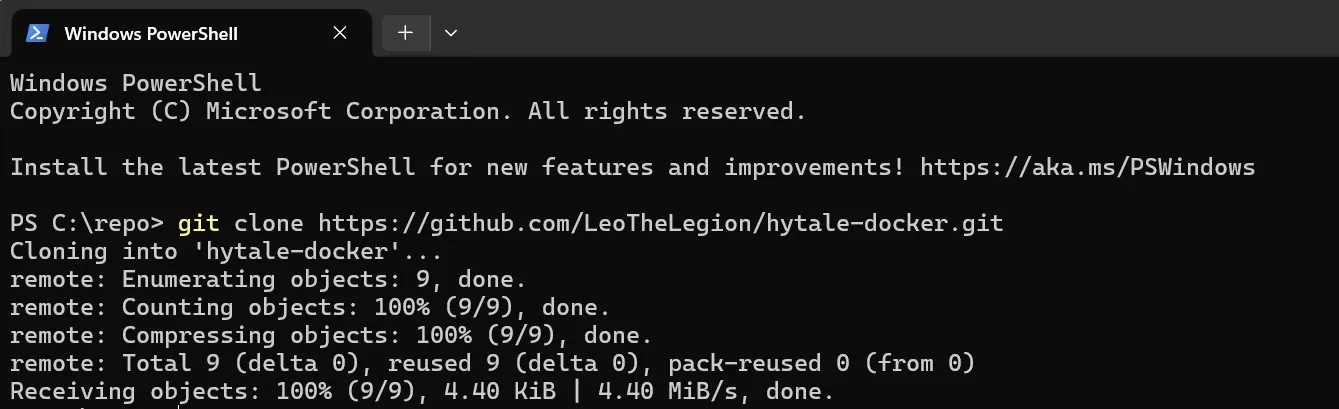
The repository includes:
hytale-docker/
├── docker-compose.yml       # Server orchestration
├── Dockerfile              # Container definition
├── entrypoint.sh           # Server startup script
├── build-server-files.sh   # Downloads Hytale server artifacts
├── authenticate.sh         # Helper for re-authentication
├── .gitignore
└── README.md
Step 3: Download Hytale Server Files
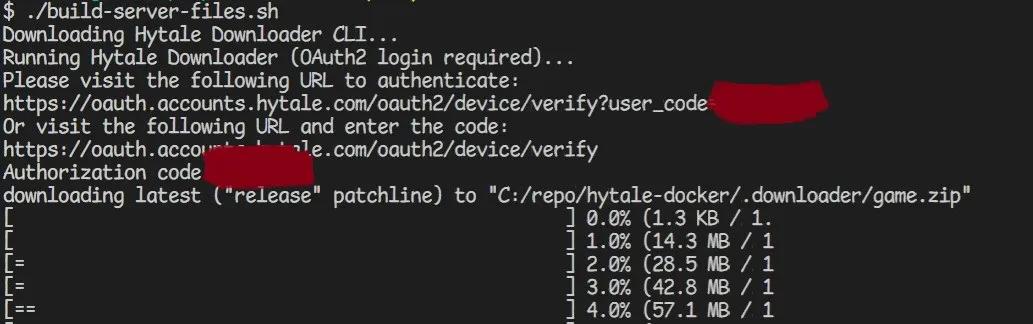
Run the build script included in the repository to download the official Hytale server:
Linux/macOS:
./build-server-files.shWindows (PowerShell or Git Bash):
.\\build-server-files.shOr if using PowerShell, you may need: powershell -ExecutionPolicy Bypass -File .\\build-server-files.sh
This script:
- Downloads the Hytale Downloader CLI from the official source
- Authenticates using OAuth2 device flow (you’ll visit a URL and enter a code)
- Extracts
HytaleServer.jar,HytaleServer.aot, andAssets.zipintoserver-artifacts/
You’ll see output like:
Downloading Hytale Downloader CLI...
Running Hytale Downloader (OAuth2 login required)...
===================================================================
DEVICE AUTHORIZATION
===================================================================
Visit: https://accounts.hytale.com/device
Enter code: ABCD-1234
===================================================================
Follow the prompts:
- Open the URL shown in your browser
- Enter the code displayed
- Log in with your Hytale account
- Authorize the download
Once complete, the server files are ready!
Step 4: Configure Server Settings (Optional)
Edit docker-compose.yml to adjust server resources:
Linux/macOS:
nano docker-compose.ymlWindows: Use any text editor (VS Code, Notepad++, Windows Notepad, etc.) to open docker-compose.yml
Key settings you can modify:
environment:
  MEMORY: '4G' # Java heap size (adjust for player count)
  AUTH_AUTO: 'true' # Auto-inject /auth login device on first boot
Memory recommendations (depends on playstyle):
The official Hytale Server Manual states that “resource usage heavily depends on player behavior.” Memory is not solely determined by player count—view distance is the primary driver of RAM consumption.
Recommended starting points:
- 4GB: Good baseline; test with your expected player count
- 6GB: Safer for steady 20-30 players with moderate view distance
- 8GB+: For 40+ players or if you increase view distance
Critical: The official manual recommends limiting maximum view distance to 12 chunks (384 blocks) for both performance and gameplay. Monitor your server’s actual resource consumption and adjust values accordingly.
Save your changes:
- nano (Linux/macOS): Press Ctrl + X, then Y, then Enter
- VS Code, Notepad++, or Notepad (Windows): Use Ctrl + S to save, then close the editor
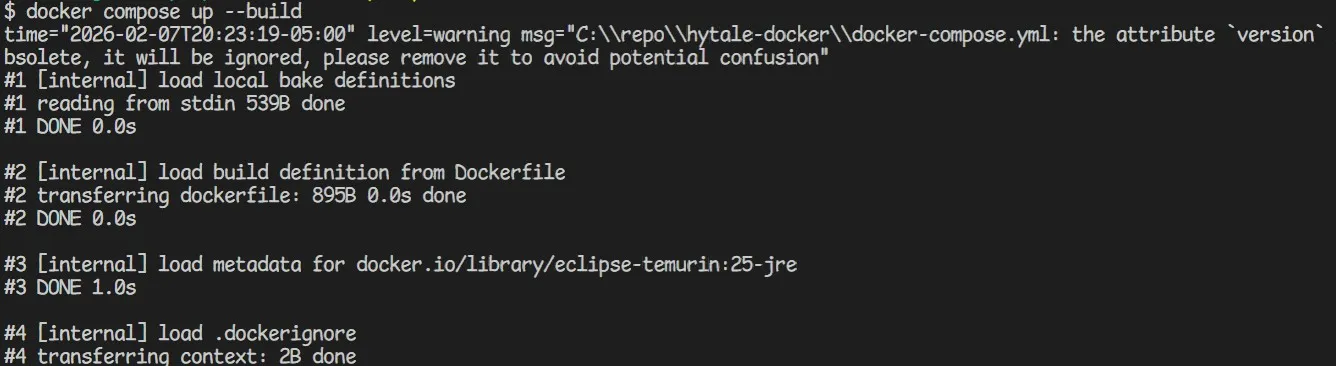
Step 5: Build and Start Your Server
Launch the server with one command:
docker-compose up --buildThe server will:
- Build the Docker image using Java 25 (Eclipse Temurin)
- Start the container and expose UDP port 5520
- Auto-detect authentication status and inject
/auth login deviceif needed - Display logs in real-time
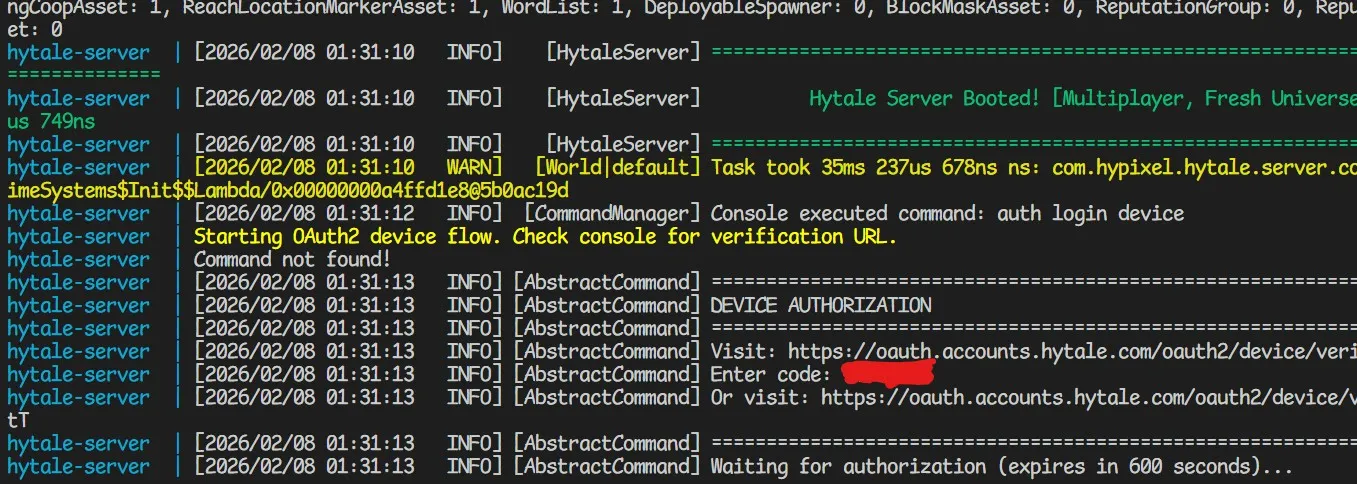
Step 6: Authenticate Your Server (If Required)
Important: Hytale servers require OAuth2 authentication before accepting player connections. The repository includes automatic authentication via the AUTH_AUTO feature.
Automatic Authentication (Default)
With AUTH_AUTO=true, the server automatically runs /auth login device on first boot. Watch the logs for:
===================================================================
DEVICE AUTHORIZATION
===================================================================
Visit: https://accounts.hytale.com/device
Enter code: ABCD-1234
Or visit: https://accounts.hytale.com/device?user_code=ABCD-1234
===================================================================
Waiting for authorization (expires in 900 seconds)...
To complete authentication:
- Open https://accounts.hytale.com/device in your browser
- Enter the code shown in the logs
- Log in with your Hytale account
- Authorize the server
Once authorized, you’ll see:
Manual Authentication (Alternative)
If you need to re-authenticate later, use the helper script:
./authenticate.shOr inject commands directly via FIFO:
docker exec -i hytale-server sh -c 'printf "/auth login device\r\n" > /opt/hytale/console.fifo'Authentication Notes
- 100 Server Limit: Each Hytale license supports up to 100 servers
- Credentials: Stored in memory during runtime; re-authentication happens on restart if needed
- Automation: For hosting providers managing many servers, see the Server Provider Authentication Guide
Step 7: Configure Firewall and Port Forwarding
Understanding Hytale’s Network Requirements
Critical: Hytale uses the QUIC protocol over UDP (not TCP). This is different from traditional Minecraft servers:
- Port: 5520 (default)
- Protocol: UDP ONLY (TCP will NOT work)
- Why QUIC: Better performance, lower latency, handles NAT traversal well
Open Firewall Port
Linux (Ubuntu/Debian with ufw):
sudo ufw allow 5520/udp
sudo ufw enable
Windows Firewall:
Windows Firewall should allow Docker port mappings automatically. If you have issues:
- Open Windows Defender Firewall
- Click Allow an app through firewall
- Add UDP port 5520 for Docker (or allow all Docker connections)
Port Forward in Your Router
Configure port forwarding with these settings:
- Port: 5520
- Protocol: UDP ONLY (do NOT select TCP or “Both”)
- Internal IP: Your server’s local IP address
- Type: UDP
Important: Many routers default to TCP or “TCP and UDP”. Make sure you select UDP ONLY for port 5520, since Hytale uses QUIC protocol.
For friends to connect from outside your network:
- Log into your router’s admin panel (typically
192.168.1.1) - Find Port Forwarding settings
- Forward external port
5520(UDP only, not TCP) to your server’s internal IP on port5520 - Save and restart your router
Important: Hytale uses the QUIC protocol over UDP. TCP forwarding is not required.
Step 8: Connect to Your Server
Before connecting: Ensure you’ve completed Step 6 (Server Authentication). Players cannot connect to an unauthenticated server.
From Your Local Network
In Hytale, go to Multiplayer → Add Server:
[your-server-ip]:5520Find your server’s local IP:
hostname -IFrom Outside Your Network
Share this address with friends:
[your-public-ip]:5520Find your public IP:
curl ifconfig.meManaging Your Server
The repository includes persistent storage for your world data. Here are the key directories:
universe/- World data, configuration, and player information.cache/- Optimized file cache for faster loadinglogs/- Server logs
View Server Status and Resource Usage
# See running containers
docker-compose ps

# View real-time resource usage
docker stats hytale-server

# Follow live server logs
docker-compose logs -f hytale-server
Stop the Server
docker-compose downThis stops the container but preserves all data in the bind-mounted directories.
Restart the Server
docker-compose up -dThe -d flag runs it in detached mode (background).
⚠️ Note: Restarting the server requires re-authentication. You’ll need to run the auth command again and complete the device flow at https://account.hytale.com/device.
Send Console Commands
Use the FIFO to inject commands without attaching:
docker exec -i hytale-server sh -c 'printf "/your-command\r\n" > /opt/hytale/console.fifo'Examples:
# Grant operator status
docker exec -i hytale-server sh -c 'printf "/op PlayerName\r\n" > /opt/hytale/console.fifo'

# Stop the server gracefully
docker exec -i hytale-server sh -c 'printf "/stop\r\n" > /opt/hytale/console.fifo'

# List online players
docker exec -i hytale-server sh -c 'printf "/list\r\n" > /opt/hytale/console.fifo'
Backing Up Your Universe
Since the repository uses bind mounts, your world data lives in the universe/ directory on your host. This makes backups incredibly simple.
Quick Backup (Simple Approach)
Stop the server and compress the directory:
docker-compose down
tar -czf hytale-backup-$(date +%Y%m%d_%H%M%S).tar.gz universe/ .cache/ logs/
docker-compose up -d
Automated Backup Script
Create a cron job to backup regularly:
# Edit crontab
crontab -e

# Add this line for daily backups at 3 AM
0 3 * * * cd /path/to/hytale-docker && docker-compose down && tar -czf backups/universe-$(date +\%Y\%m\%d).tar.gz universe/ && docker-compose up -d
Restore from Backup
docker-compose down
tar -xzf hytale-backup-20260207_120000.tar.gz
docker-compose up -d
Updating Your Server
When Hytale releases updates, refresh the server files and rebuild:
# Stop the server
docker-compose down

# Download latest server files
./build-server-files.sh

# Rebuild and restart
docker-compose up --build -d
The build script automatically fetches the latest Hytale server version. Your world data in universe/ is preserved.
Troubleshooting
Server Won’t Start
Check the logs:
docker-compose logs hytale-serverCommon issues:
- Server files missing: Run
./build-server-files.shto download artifacts - Port already in use: Check with
sudo netstat -tulpn | grep 5520 - Memory limit too low: Increase
MEMORYindocker-compose.yml - Not authenticated: Check logs for device authorization prompt, or run
./authenticate.sh
Players Can’t Connect
- Authentication: Ensure server is authenticated (check logs for “Authentication successful”)
- Firewall: Ensure UDP port 5520 is open with
sudo ufw status - Port forwarding: Verify router is forwarding UDP port 5520 (NOT TCP)
- Protocol: QUIC uses UDP only -
telnetwon’t work for testing - Server status: Verify container is running with
docker-compose ps
Server Running Slowly
Monitor resource usage:
docker stats hytale-serverIf CPU/memory maxed out, increase in docker-compose.yml:
deploy:
  resources:
    limits:
      cpus: '4.0' # Increase from 2.0
      memory: 8G # Increase from 4G
Container Keeps Restarting
Check logs for errors:
docker-compose logs -fSet restart: unless-stopped only after confirming it starts successfully.
Performance Optimization Tips
Set appropriate memory: Adjust
MEMORYindocker-compose.ymlbased on player count:- 4GB for 10-20 players
- 6GB for 20-40 players
- 8GB for 40+ players
Monitor with
docker stats: Watch CPU/memory usage and adjust resource limitsRegular backups: Automate with cron to backup the
universe/directory dailyLimit view distance: Default is 12 chunks. Higher values increase RAM usage. Configure in
universe/worlds/[world-name]/config.jsonKeep updated: Run
./build-server-files.shand rebuild when Hytale releases updates to get latest features and security patches
Next Steps
Your Docker-based Hytale server is now running! Here’s what to do next:
- Configure server settings: Edit
universe/config.jsonfor server name, max players, PVP, difficulty, MOTD, and gameplay settings - Manage operators: Use FIFO command injection or
./authenticate.shto run/op <username>commands - Manage permissions: Configure
universe/permissions.jsonfor fine-grained access control - Set up whitelist: Edit
universe/whitelist.jsonor inject/whitelist add <username>commands - Invite friends: Share your server address and enjoy playing together
- Set up automated backups: Create a cron job to regularly backup your
universe/directory - Join the community: Connect with other server hosts in Hytale Discord
- Monitor performance: Use
docker statsregularly to ensure smooth gameplay
Conclusion
Using this Docker repository transforms Hytale server hosting into a streamlined, production-ready system. You now have:
✅ Automatic authentication handling OAuth2 device flow
✅ Persistent storage with simple bind mounts
✅ One-command deployment and updates
✅ Production-grade setup ready for your gaming community
The repository is open source and actively maintained. For issues, feature requests, or contributions, visit:
GitHub Repository: https://github.com/LeoTheLegion/hytale-docker
Happy hosting, and enjoy your Hytale adventure with friends!
Need Help? Check the Hytale Support or the repository README.