· Falling Sand Series · 7 min read
Adding Water to My Falling Sand Simulator
Explore the world of Falling Sand Simulation, optimize performance, and dive into shaders. Join me for the next exciting update!
Welcome back to the next chapter of my Falling Sand Simulation adventure. In our previous installment, we laid the foundation for our virtual world, introduced the element of sand, and implemented a chunk-based optimization approach. If you missed it, you can catch up by visiting this link.
Then There Was Water
In this installment, we’ll introduce water into our simulation. As a quick recap, each element within our simulated world adheres to a set of rules based on the principles of cellular automata. Water, like sand, follows three fundamental rules, but it also incorporates two additional rules.
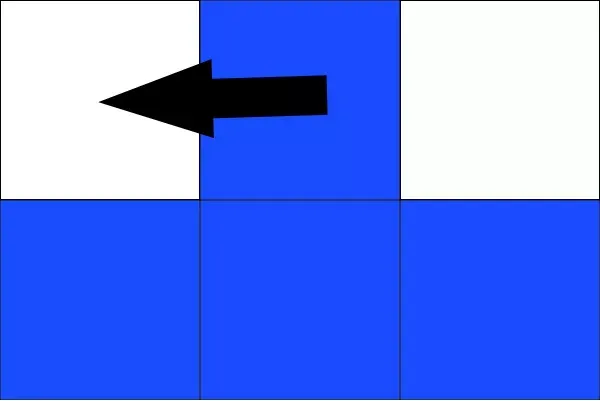
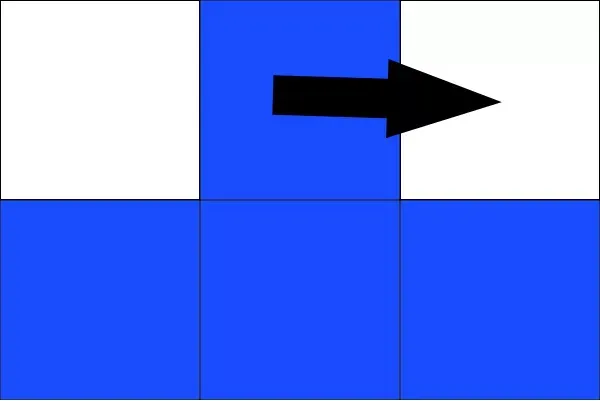
One key behavior of water is its ability to seek available space either to the left or right. This movement emulates the natural property of water as it seeks paths to flow through, akin to “small waves.”


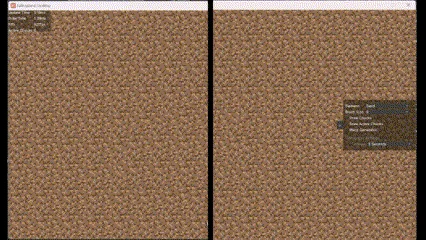
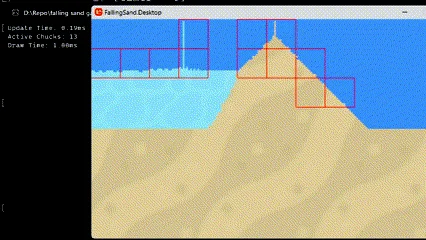
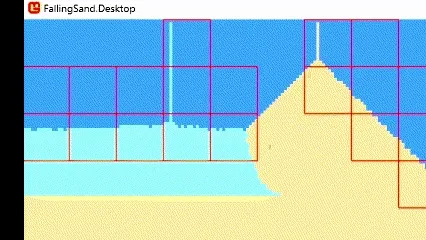
Now, let’s dive into the practical demonstration to see these rules in action.
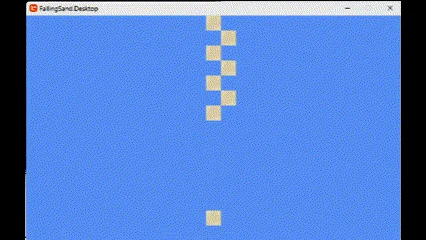
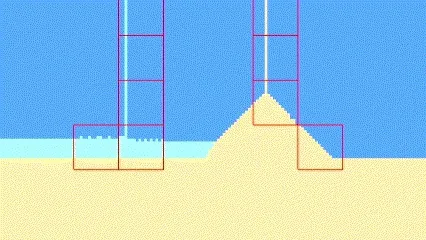
Wait Sand shouldn’t be acting like that
In our simulation, it’s become apparent that the way sand stacks on water isn’t quite true to the natural world.
I’m referring to these substances as “liquids” because we’re about to introduce the concept of density. This addition opens up exciting possibilities for future developments, such as simulating how solid elements might float on liquids or exploring interactions like oil and water. Density will also introduce an element of randomness into the simulation. For now, there’s a 20% chance that sand will attempt to swap places with water when moving left or right.
Code
C#
private bool Rule2(SandSimulationSystem system, int i,
int x_current, int y_current, out int movedElementIndex)
{
	ElementTypes element = system.getElement(x_current + 1, y_current + 1, PositionType.LocalSpace);

	if (element == ElementTypes.Void) // Outside of map
	{
		movedElementIndex = -1;
		return false; // I can't move
	}

	if (element == ElementTypes.Empty)
	{
		int to = (y_current + 1) * system.width + (x_current + 1);
		system.SwapElements(i, to);
		movedElementIndex = to; // where I moved to
		return true; // I moved
	}

	ElementProp elementProp = system.GetElementProp(element);

	if (elementProp is ILiquid || elementProp.Density < this.Density)
	{
		int r = system.random.Next(0, 11);

		if (r > 8)
		{
		int to = (y_current + 1) * system.width + (x_current + 1);
		system.SwapElements(i, to);
		movedElementIndex = to; // where I moved to
		return true; // I moved
		}
	}

	movedElementIndex = -1;
	return false; // I can't move
}
This revision clarifies the issue with sand stacking on water and sets the stage for the introduction of density in your simulation, making it more engaging for readers.
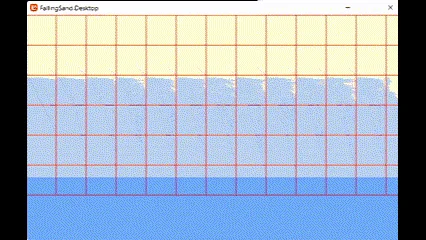
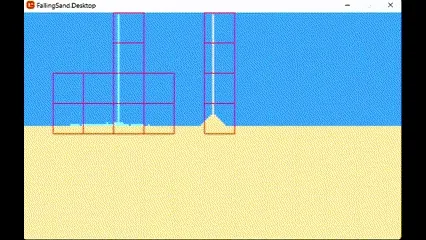
A small optimization
In this section, we’ll optimize our chunk processing method.
Currently, we iterate through each chunk, checking if it needs processing.
C#
for (int i_c = chucks.Length - 1; i_c >= 0; i_c--)
{
	Chuck chuck = chucks[i_c];
	if (!chuck.active) continue;

	chuck.Update(this);
}
To enhance efficiency, we’ll introduce a list that stores active chunk indexes from the chunk array. We’ll dynamically add or remove chunks as they become active or inactive.
With this improvement, our loop is now streamlined.
C#
for (int i = activeChucksIndexes.Count - 1; i >= 0; i--)
{
	int chuckIndex = activeChucksIndexes[i];
	Chuck chuck = chucks[chuckIndex];
	chuck.Update(this);
}
This simple change results in a small performance boost.
Shaders are hard
I took on the ambitious challenge of implementing sprite batching. Sprite batching involves submitting multiple sprites to the GPU with a single draw call, a technique that can significantly reduce the CPU resources required for GPU communication.
While this endeavor left me scratching my head for a few days, the results were well worth it. I managed to cut my CPU Draw Time from approximately 5ms down to a mere 1ms.

For those interested, here’s a peek at the shader code I used:
HLSL
#if OPENGL
	#define SV_POSITION POSITION
	#define VS_SHADERMODEL vs_3_0
	#define PS_SHADERMODEL ps_3_0
#else
	#define VS_SHADERMODEL vs_4_0_level_9_1
	#define PS_SHADERMODEL ps_4_0_level_9_1
#endif

extern int WORLD_WIDTH;
extern int WORLD_HEIGHT;
extern float3 TARGET_COLOR;

extern Texture2D WorldTexture;

extern Texture2D ElementTexture;

sampler2D WorldTextureSampler = sampler_state
{
    Texture = <WorldTexture>;
};

sampler2D ElementTextureSampler : register(s2) = sampler_state
{
    Texture = <ElementTexture>;
};


struct VertexShaderOutput
{
    float4 Position : SV_POSITION;
    float4 Color : COLOR0;
    float2 UV : TEXCOORD0;
};

float4 TextureRepeat(sampler2D _sampler, float2 uv, float Tex_width, float Tex_height)
{
    int2 world_coor = uv * int2(WORLD_WIDTH, WORLD_HEIGHT);
    int2 tile_coor = world_coor % int2(Tex_width, Tex_height);
    float2 tile_uv = tile_coor / float2(Tex_width, Tex_height);
    float4 col = tex2D(_sampler, tile_uv);
    return col;
}


float4 MainPS(VertexShaderOutput input) : COLOR
{
    float4 pixelColor1 = tex2D(WorldTextureSampler, input.UV);

    if (pixelColor1.r == TARGET_COLOR.r
        && pixelColor1.g == TARGET_COLOR.g
        && pixelColor1.b == TARGET_COLOR.b)
        return TextureRepeat(ElementTextureSampler, input.UV, 64, 64);

	//	And we return the result
    return float4(0,0,0,0);
}

technique SpriteBlending
{
    pass P0
    {
        PixelShader = compile PS_SHADERMODEL MainPS();
    }
};
As a disclaimer, this marked my initial attempt at crafting a shader. While I’m not providing a detailed explanation at this time, I hope this code serves as a valuable resource for others interested in sprite batching and shader development. Also, I hard coded the element texture size into the shader. I’ll promote that to a parameter later.
Assistance with HLSL in MonoGame
For those who stumbled upon this post in search of help with HLSL in MonoGame, this section is dedicated to addressing your concerns.
During my own journey, I encountered a situation where I needed to add my texture parameter to the Graphics Device Texture array while also introducing a “register” to the shader’s “Texture2D ElementTexture” parameter.
Here’s the relevant C# code snippet for context:
C#
graphicsDevice.Textures[1] = sandTexture;

EffectParameter effectParameter2 = shader.Parameters["ElementTexture"];
if (effectParameter2 != null)
   effectParameter2.SetValue(sandTexture);
Here’s the relevant HLGL code snippet for context:
HLSL
sampler2D ElementTextureSampler : register(s2) = sampler_state
{
    Texture = <ElementTexture>;
};
One peculiar observation I made was the need to assign the register “s2” in my shader code instead of the expected “s1.” Initially, I assumed that shader registers began at zero. While this might indicate a potential issue within MonoGame, my current level of expertise doesn’t allow me to confirm or deny this.
Understanding WorldTexture
In the shader code, the “WorldTexture” serves as the pixel array derived from the element array, and it’s used to populate a texture object. Each element in this array is associated with a specific color that represents it.
C#
for (int i = 0; i < elements.Length; i++)
{
	if (elements[i] < 0) // must be empty
		worldPixels[i] = new Color();
	if (elements[i] == 0) // sand
		worldPixels[i] = new Color(255,196,0);
	if (elements[i] == 1) // water
		worldPixels[i] = new Color(0, 42, 255);
}
Currently, I employ two separate draw calls: one for water and the other for sand. While this approach works for now, I’m uncertain whether maintaining separate draw calls for each element type is the most efficient method. As my project progresses, I may consider grouping them if they can share the same shader. In fact, I have plans to develop a dedicated water shader to further to improve the graphical fidelity.
Here’s a snippet of the code I use for rendering sand:
C#
worldTexture.SetData<Color>(worldPixels);

graphicsDevice.Textures[1] = sandTexture;

EffectParameter effectParameter0 = shader.Parameters["WORLD_WIDTH"];
if (effectParameter0 != null)
	effectParameter0.SetValue(width);

EffectParameter effectParameter1 = shader.Parameters["WORLD_HEIGHT"];
if (effectParameter1 != null)
	effectParameter1.SetValue(height);

EffectParameter effectParameter2 = shader.Parameters["ElementTexture"];
if (effectParameter2 != null)
   effectParameter2.SetValue(sandTexture);

EffectParameter effectParameter3 = shader.Parameters["TARGET_COLOR"];
if (effectParameter3 != null)
	effectParameter3.SetValue(new Color(255, 196, 0).ToVector3());

spriteBatch.Begin(
	effect: shader,
	samplerState: SamplerState.PointClamp
	);
spriteBatch.Draw(worldTexture,
		new Rectangle(0,0,width << scale, height << scale),
		Color.White);
spriteBatch.End();
Reaching the End of the Journey
If you’ve made it this far, I want to express my gratitude for your time and interest. There’s still an abundance of work left to be done on this project, and I look forward to sharing more with you in the next post!
In our next installment, we’ll be introducing oil into our simulation. Check it out here: Introducing Oil and a New Liquid Shader in My Falling Sand Simulator.
Thank you for joining me in this part of the Falling Sand Simulation journey. Stay tuned for exciting updates and developments in the future. Until next time!