· Falling Sand Series · 4 min read
Introducing Oil and a New Liquid Shader in My Falling Sand Simulator
Join me for the third chapter of my simulation journey, diving into oil-water dynamics and liquid shader experimentation. Let's explore together!
Welcome to another exciting development log! In our previous update, we introduced water and element density into our simulator, unlocking the fascinating dynamics of objects floating and sinking. We also delved into the world of HLSL shaders. If you missed the last post, you can catch up right here: Adding Water to My Falling Sand Simulator
Introducing Oil into the Simulation
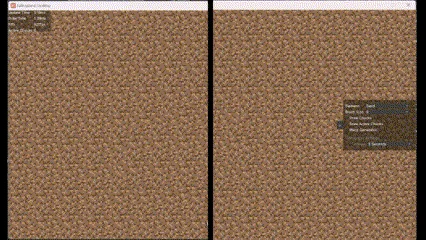
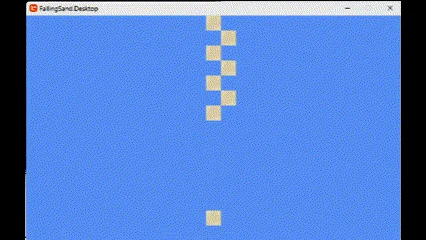
In this segment, we’re expanding the simulation by incorporating oil. Unlike water, oil adheres to a similar rule set but with a lower density of 950 kg/m³. This distinction allows oil to float atop water, mimicking the well-known property of immiscibility between oil and water.
To visually render oil, I’ll be leveraging the existing water texture but altering it to a grey hue using MonoGame. Let’s witness the results in action.
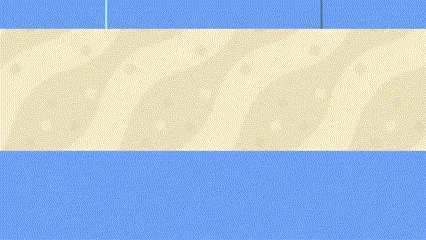
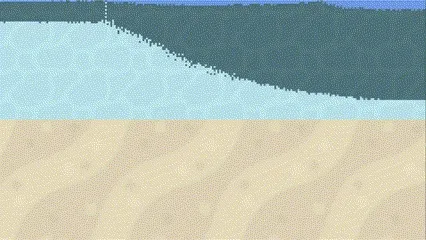
As the simulation progresses and fills the screen, observe how water gradually reaches an equilibrium level with the oil.
Crafting a Better Shader for Liquid Simulation
Expanding on the addition of two distinct liquids, I ventured into the realm of liquid shader development. While my experience with HLSL is still growing, I’ll share my approach. The primary objectives were to create a dynamic back-and-forth movement for the water texture and introduce a shallow effect to the liquids, building upon the foundation of the initial basic shader.
Moving the Texture
To achieve the back-and-forth texture motion, I introduced two new shader parameters: “timeInSeconds” and “WaveStr.” These parameters are essential for the “moveTexture” function. “moveTexture” utilizes a sine wave controlled by “timeInSeconds” to adjust the tile’s UV position during the final computation. “WaveStr” allows us to control the intensity of the sine wave.
HLSL
HLSL
...
extern float timeInSeconds;
extern float WaveStr;
...
float2 moveTexture(float2 tile_uv)
{
    float sinoffset = ((sin(timeInSeconds) + 1.0f) / 2.0f) * WaveStr;

    float wave_x = tile_uv.x + sinoffset;
    if (wave_x > 1.0f)
    {
        wave_x = wave_x - 1.0f;
    }

    float wave_y = tile_uv.y + sinoffset;
    if (wave_y > 1.0f)
    {
        wave_y = wave_y - 1.0f;
    }

    return float2(wave_x, wave_y);
}
...
float4 TextureRepeat(sampler2D _sampler, float2 uv, float Tex_width, float Tex_height)
{
    int2 world_coor = uv * int2(WORLD_WIDTH, WORLD_HEIGHT);

    int2 tile_coor = world_coor % int2(Tex_width, Tex_height);
    float2 tile_uv = tile_coor / float2(Tex_width, Tex_height);

    float2 movedTile_uv = moveTexture(tile_uv);

    float4 col = tex2D(_sampler, movedTile_uv);
    return col;
}
Shallow Effect
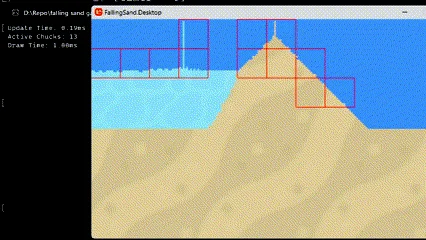
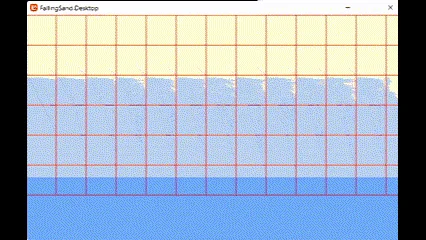
Implementing the shallow effect involves pixel testing above the target pixel. The “shallowness” is determined by the number of pixels above the target pixel marked as “Empty,” resembling an empty element. This value is then applied to the alpha channel of the target pixel. This experimental approach reflects a query into how lighting principles might operate.
In HLSL
HLSL
...
extern int ShallowDepth;
...
float shallowness(int2 world_coor)
{
float str = 1.0f;
float shallowDepth_Float = float(ShallowDepth);
float stepstr = 0.4f / shallowDepth_Float;
[unroll(50)]
for (int i = 0; i < ShallowDepth; i++)
{
int y = world_coor.y - i;
if (y >= 0)
{
float2 uv = worldToUV(int2(world_coor.x, y));
float4 col = tex2D(WorldTextureSampler, uv);
if (col.r == 1.0f && col.g == 1.0f && col.b == 1.0f)
{
str -= stepstr;
}
}
}
return clamp(str, 0.2f, 1.0f);
}
...
float4 TextureRepeat(sampler2D _sampler, float2 uv, float Tex_width, float Tex_height)
{
int2 world_coor = uv * int2(WORLD_WIDTH, WORLD_HEIGHT);
int2 tile_coor = world_coor % int2(Tex_width, Tex_height);
float2 tile_uv = tile_coor / float2(Tex_width, Tex_height);
float2 movedTile_uv = moveTexture(tile_uv);
float4 col = tex2D(_sampler, movedTile_uv);
col.a = shallowness(world_coor);
return col;
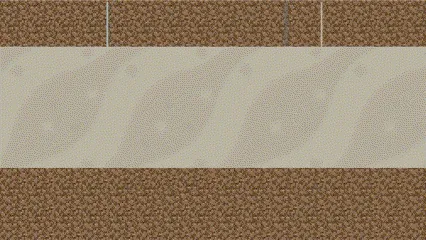
}To enhance the presentation of the shader, I incorporated Programmer Art from Minecraft as the background of the game.
Looking Forward
In the next phase of development, I’m excited to introduce a painter tool equipped with a comprehensive debug overlay.
The painter tool is designed to grant users the ability to incorporate any element they desire, resembling the functionality of a conventional paint program.
Moreover, the debug overlay will replace my current console log setup, providing a more efficient and informative way to track the simulation’s progress. Stay tuned for these upcoming enhancements.
In our next post, we will be adding generators to our falling sand simulator. You can check it out here: Adding Generators To My Falling Sand Simulator.